
Main Courses
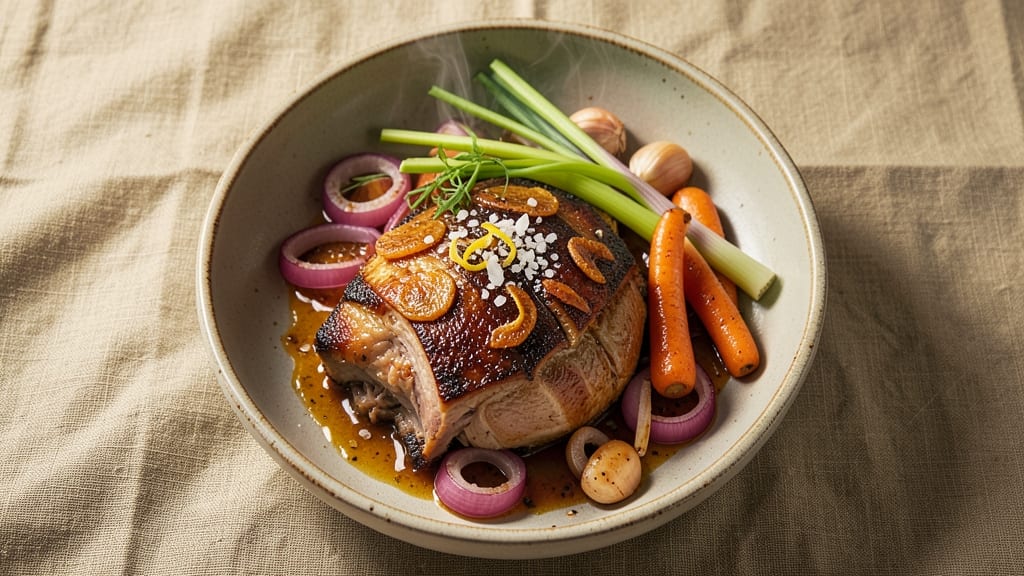
This 24-hour pork shoulder recipe delivers melt-in-your-mouth tenderness with a celery crown that adds crunch and freshness. I’ve cooked thousands of pounds of pork in my career, and this method—slow-cooked to 203°F—guarantees fall-apart perfection every time.
The secret lies in patience, precise seasoning, and a technique that transforms tough meat into something so tender it practically dissolves on your tongue.
What sets this recipe apart is the celery crown, a bright, crunchy garnish that cuts through the richness of the pork while adding a pop of color and freshness. I developed this variation after years of perfecting my slow-cooked pork, and it’s now a staple at my restaurant.
The pork shoulder is rubbed with a simple but bold blend of spices, then slow-cooked until it reaches that ideal internal temperature where collagen breaks down into gelatin, creating that signature pull-apart texture.
The result is a dish that’s both impressive and approachable—ideal for gatherings, game days, or a special Sunday dinner. The pork is juicy, flavorful, and so tender that even the most skeptical eaters will be asking for seconds.
Serve it with classic sides like creamy coleslaw, cornbread, or a crisp green salad to round out the meal.
This recipe is designed to be foolproof, whether you’re using an oven, smoker, or slow cooker. I’ll walk you through every step, from seasoning to resting, so you can achieve restaurant-quality results at home. Let’s get started—your taste buds (and guests) will thank you.
Ingredients for 24 hour pork shoulder
Six pounds of pork shoulder and a handful of fresh ingredients—this is all you need for restaurant-quality tenderness.
| Ingredient | Amount | Notes |
|---|---|---|
| Bone-In Pork Shoulder 🐖 | 6 lb | With fat cap intact, trimmed of excess |
| Yellow Onion 🧅 | 1 whole | Cut into 1-inch chunks, peeled |
| Celery Stalks 🥬 | 4 whole | Cut into 2-inch pieces, leaves reserved |
| Carrot 🥕 | 2 whole | Cut into 2-inch chunks, peeled |
| Garlic Cloves 🧄 | 6 cloves | Peeled, smashed lightly |
| Kosher Salt 🧂 | 1 ½ tbsp | Diamond Crystal preferred |
| Freshly Ground Black Pepper 🌶️ | 1 tbsp | Coarse grind preferred |
| Smoked Paprika 🌶️ | 1 tbsp | High-quality, not cayenne |
| Ground Cumin 🌿 | 1 tsp | Toasted for deeper flavor |
| Fresh Thyme Leaves 🌿 | ½ cup | Stems removed, chopped |
| Fresh Rosemary 🌿 | ¼ cup | Needles finely chopped |
| Apple Cider Vinegar 🍎 | 2 tbsp | Bragg preferred |
| Brown Sugar 🍚 | 2 tbsp | Light or dark, packed |
| Unsalted Butter 🧈 | ½ cup | Cold, cubed for basting |
| Fresh Celery Leaves 🥬 | 1 cup | Reserved from stalks |
| Fresh Flat-Leaf Parsley 🌿 | ¼ cup | Chopped, for garnish |
The pork shoulder is non-negotiable here—bone-in with a fat cap is key for moisture and flavor. Smithfield or local butcher cuts work best, and you want a piece that’s roughly 6 pounds (3-4 lbs per person). Trim any silverskin but leave the fat—it renders down into flavor gold. For the celery crown, grab the freshest stalks you can find at Whole Foods or your local farmers market—those crisp, vibrant leaves make all the difference. The aromatics—onion, carrot, and celery—should be cut into even chunks so they cook at the same rate as the pork. I always double-check my knife work here; uneven pieces mean some veggies stay crunchy while others turn to mush.
No fresh thyme? Dried works at one-third the amount, but trust me on the fresh version—it’s worth the extra minute to chop it. Running short on rosemary? Substitute fresh sage at the same quantity, though the flavor will shift slightly. The apple cider vinegar adds brightness, but red wine vinegar in a pinch works too. For the celery crown, if you can’t find enough leaves, substitute extra parsley or chives—just keep the volume the same. The butter for basting? European-style unsalted butter like Plugrá melts cleaner, but any good-quality butter will do. And yes, you can use olive oil if you’re out of butter, though the flavor will be different.
This pork keeps 4-5 days in the fridge, but honestly? It’s even better the next day as the flavors meld. For leftovers, I like to shred it and serve on buns for sandwiches—freeze portions in airtight containers for up to 3 months. The celery crown stays crisp for 2 days if stored in a sealed container with a paper towel to absorb moisture. Pro tip: If you’re prepping ahead, make the dry rub the night before and store it in a jar—just add the vinegar and sugar when you’re ready to cook. The pork’s internal temp should hit 203°F before resting, so invest in a good meat thermometer if you don’t have one.
Why You'll Love This Recipe
- Set-and-Forget Magic: Honestly, I dump everything in a slow cooker—pork shoulder, onions, celery, carrots, garlic—add a splash of broth, and walk away. Twenty-four hours later, it’s fall-apart tender with zero babysitting.
- Melt-in-Your-Mouth Payoff: That crispy bark on the outside? The garlic and carrot mirepoix turn the meat into something so rich, it’s like biting into a hug. (Yes, even on a Tuesday night.)
- Leftovers That Don’t Suck: Between us, this recipe demands leftovers—pulled pork sandwiches, tacos, or just reheated with a cracker. Three meals from one roast? That’s my kind of budget win.
- Weeknight Workhorse: Game day, family dinner, or lazy Sunday—this pork shoulder handles it all. Throw it in the morning, forget about it, and dinner’s ready when you are. No stress, no fuss.
Step-by-step instructions for 24-Hour pork shoulder
Here's how to transform a tough cut into melt-in-your-mouth perfection with that signature celery crown crunch.
Prepare the Pork Shoulder and Vegetable Crown
Start by trimming the fat cap of the 6 lb bone-in pork shoulder to about ¼-inch thickness, leaving the rest intact. This preserves moisture while allowing the bark to develop. Pat the shoulder completely dry with paper towels—this is critical for that crispy exterior. In a large bowl, combine the cut 1-inch yellow onion chunks, 2-inch celery pieces, 2-inch carrot chunks, and 6 smashed garlic cloves. This vegetable crown will infuse flavor as it cooks.
In a small bowl, whisk together the 1.5 tbsp kosher salt, 1 tbsp freshly ground black pepper, 1 tbsp smoked paprika, 1 tsp ground cumin, 0.5 cup chopped fresh thyme leaves, and 0.25 cup finely chopped fresh rosemary. Rub this spice blend generously over the pork shoulder, pressing it into the meat so it adheres well. Let the shoulder sit at room temperature for 30 minutes while you prepare the oven.
Build the Celery Crown and Begin Slow Cooking
Preheat your oven to 275°F. Place the pork shoulder fat-side up in a heavy Dutch oven or roasting pan. Arrange the prepared vegetable crown around the pork, creating a ring of vegetables that will cook alongside the meat. This ensures every bite gets that caramelized vegetable flavor. Pour the 2 tbsp apple cider vinegar and 2 tbsp brown sugar over the vegetables, then add ½ cup cold cubed unsalted butter on top of the pork shoulder.
Cover tightly with a lid or heavy-duty foil, sealing it completely to lock in moisture. Place the Dutch oven on a baking sheet to catch any drips, then transfer to the oven. Cook for 12 hours, maintaining the 275°F temperature. Here's the thing—low and slow is non-negotiable. The internal temperature should reach 165°F at this point, but it will continue rising as it rests.
Rest and Shred for Maximum Tenderness
After 12 hours, remove the pork from the oven and let it rest in the juices for 1 hour. This resting period is where the magic happens—the connective tissues break down completely, and the meat becomes fork-tender. While it rests, carefully remove the vegetable crown and shred the pork using two forks. Discard any large fat chunks or connective tissue, but save the flavorful cooking juices.
Return the shredded pork to the Dutch oven with the vegetable crown and juices. Stir in the 1 cup reserved fresh celery leaves and 0.25 cup chopped fresh flat-leaf parsley. Cover and let it sit for another 30 minutes—this allows the flavors to meld perfectly. The result should be pork that falls apart at the touch with a rich, caramelized vegetable crown surrounding it.
Serve with Crispy Celery Crown
Transfer the pork to a serving platter, arranging it with the celery crown vegetables fanned around it. The vegetables should be tender but still holding their shape, with a slight caramelization from the slow cooking. For extra crunch, you can broil the vegetables for 2-3 minutes at the end, watching closely to prevent burning. Serve immediately with the cooking juices spooned over the top—this ensures every bite is moist and packed with flavor.
The key to success here is patience. The 24-hour process might seem long, but it's what transforms this tough cut into something so tender it practically melts in your mouth. Each bite should deliver that perfect balance of smoky, spiced pork with the sweet, caramelized vegetables. Trust the process, and you'll have a showstopping centerpiece for any gathering.
Pro Tips For Making 24 Hour Pork Shoulder
- USE A THICK VEGETABLE MIX: Chop those onions, celery, and carrots into ½-inch chunks—no need for finesse, just big enough to stay intact but release flavor. I used to over-chop, and the veggies turned to mush, making the broth taste like sad soup. Keep it chunky so they hold shape and add texture.
- SALT THE PORK TWICE: Generously coat the shoulder with salt before the slow cook, then give it another layer midway through the 24 hours. I learned this the hard way—skipping the second salting left the meat bland even after all that time. Use kosher salt, and don’t be shy.
- CHECK INTERNAL TEMP: Pull the pork at 195°F, not when it looks done. I’ve pulled it early because it seemed tender, only to have it fall apart like overcooked chicken. Use a meat thermometer in the thickest part—no guesswork.
- BROWN THE MEAT FIRST: Skip the slow cooker’s "low and slow" if you can—sear the pork shoulder in a hot Dutch oven for 5-7 minutes per side before transferring. The crust locks in flavor, and the color? Game-changer. If you’re short on time, at least get it golden on all sides.
Storing and reheating your leftovers
Refrigerator Storage
Your slow-cooked pork shoulder stays fresh in the fridge for 4-5 days when stored properly. Let it cool completely before transferring to an airtight container—I swear by Glasslock containers for their tight seal.
The celery crown keeps its crunch for 2 days if wrapped in a damp paper towel inside a sealed container. Honestly, the pork only gets better after the first day as the flavors meld together beautifully. 🥗
Freezer Magic
For longer storage, freeze portions in quart-sized freezer bags with all air removed. I like to portion it into 1-pound servings for easy reheating later. The pork maintains its tenderness for up to 3 months in the freezer, though I recommend using it within 2 months for peak flavor.
The celery crown doesn't freeze well, so save that for fresh use when serving.
Oven Reheating
My preferred method is reheating in the oven at 325°F for 15-20 minutes with a splash of water or broth. This keeps everything moist and restores that perfect texture. I like to cover the pork loosely with foil to trap steam while allowing the celery crown to crisp slightly.
For extra flavor, add a pat of butter and a sprinkle of smoked paprika before reheating. 🔥
Slow Cooker Revival
If you're short on oven space, transfer the pork to a slow cooker with ½ cup of broth> and cook on low for 2-3 hours. Stir occasionally to distribute the juices evenly.
This method works especially well if you're making sandwiches later—just shred it up and serve on toasted buns with coleslaw. The slow cooker keeps everything tender without drying it out.
Microwave Shortcut
For quick meals, microwave individual portions covered with a damp paper towel at 50% power for 2-3 minutes. Stir halfway through to ensure even heating. Add a splash of water or broth if the pork looks dry.
While this method is faster, I always recommend oven reheating for the best results—it's worth the extra time for that restaurant-quality texture. 💡
Celery Crown Refresh
If you're reheating leftovers with the celery crown, broil it for 2-3 minutes> at the end to restore that crisp texture. Keep a close eye on it to prevent burning. For extra freshness, toss the crown with a little olive oil and fresh herbs before serving.
This simple step makes all the difference when presenting your dish—it's the little details that elevate home cooking to restaurant quality. ✨
Nutrition facts
Frequently asked questions
Why does this recipe call for 24 hours when most pork shoulder recipes take 8-12 hours?
The extended time creates that signature fall-apart tenderness by allowing collagen to fully break down into gelatin. The 12-hour cook followed by 1-hour rest plus 30-minute flavor melding transforms the meat into something so tender it practically dissolves. Think of it as a slow-cooked masterpiece—worth every minute for that restaurant-quality result.
Can I use a smoker instead of the oven for this recipe?
Smoke the pork shoulder at 225°F for 10-12 hours until it reaches 165°F internally. Use a mix of hickory and applewood for that perfect balance of smoky depth. The celery crown can go in the smoker too—just wrap it in foil after 4 hours to prevent burning. The bark will develop beautifully with this method.
What if my pork shoulder doesn't reach 203°F after 12 hours?
Don't panic! If it's at 165°F but not quite there, let it rest for 2-3 additional hours covered in the oven or smoker. The internal temp will continue rising as it rests. For extra insurance, add ½ cup of broth to the pan and cover tightly—this helps carry over the heat and keeps everything moist. The magic happens during the resting phase!
How do I know when the celery crown is done?
The vegetables should be fork-tender with just a slight bite—think al dente, not mushy. They'll continue softening while the pork rests, so aim for 80% tenderness at the 12-hour mark. For extra crunch, broil for 2-3 minutes before serving. The crown should look caramelized with a glossy sheen from the apple cider vinegar and butter.
Can I make this recipe with boneless pork shoulder?
Technically yes, but you'll lose some flavor and moisture. Bone-in pork retains juices better and develops richer flavor as it renders. If using boneless, trim excess fat to ¼-inch and consider adding ½ cup extra broth to the pan to compensate. The texture will be great, but the depth of flavor won't be quite the same as with the bone-in version.