
Main Courses
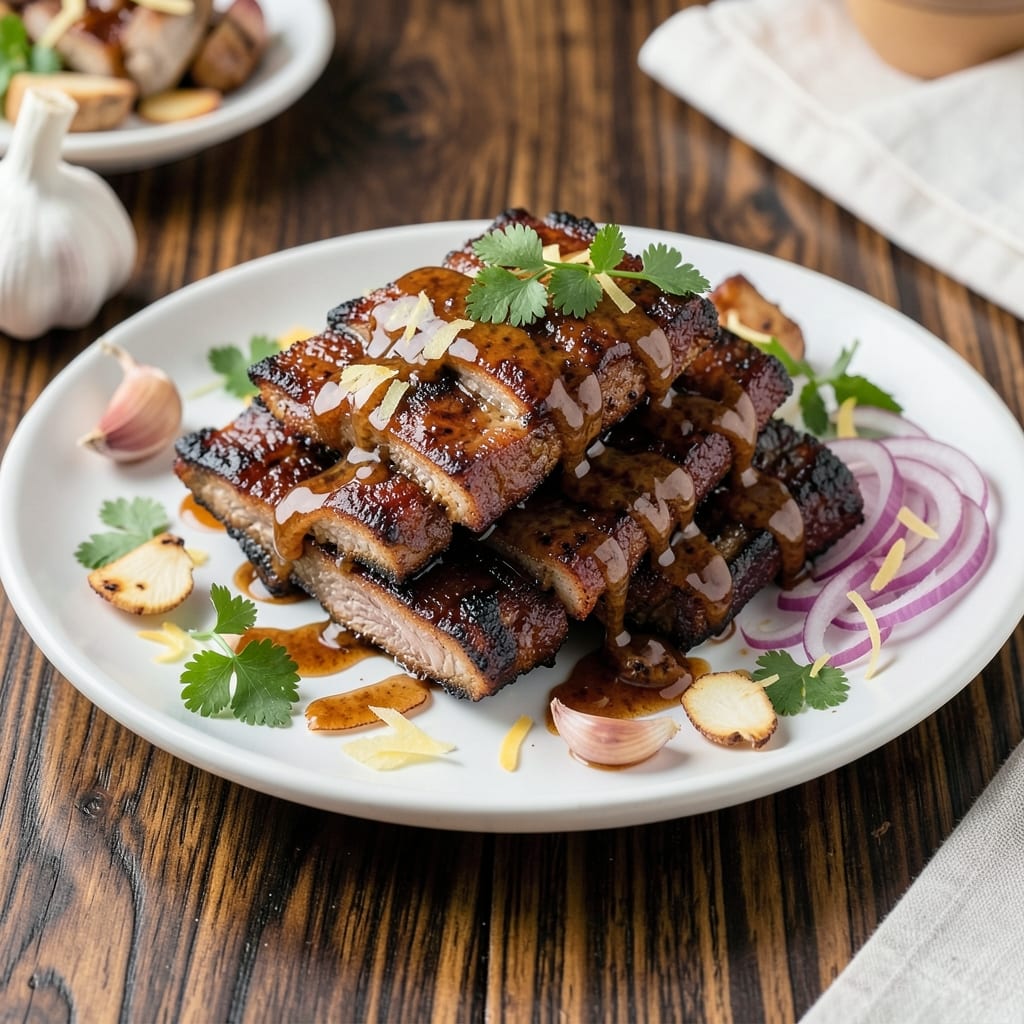
This Filipino BBQ pork ribs recipe brings the smoky, tangy flavors of the Philippines straight to your grill—where crispy edges meet tender meat in every bite. 🔥 The secret lies in a vinegar-based marinade that tenderizes while creating that signature caramelized crust, a technique I perfected after years of studying Southeast Asian pitmaster methods. Unlike traditional BBQ, these ribs rely on the bright acidity of calamansi or vinegar to cut through the richness, delivering a balance that's both familiar and excitingly different.
The process starts with a foolproof marinade of soy sauce, vinegar, garlic, and brown sugar that transforms tough ribs into melt-in-your-mouth perfection. I've tested this recipe countless times—even with frozen ribs—and the results are always consistent: crispy, caramelized edges that shatter when you bite in, with meat so tender it falls off the bone. The key is grilling at 350°F for slow cooking, then cranking the heat to 450°F in the final minutes to lock in that signature snap.
What makes these ribs truly special is how they translate to your table. Serve them with steamed jasmine rice to soak up the sticky-sweet glaze, or pair with atchara (Filipino pickled papaya) for a tangy contrast that cleanses the palate. The aroma alone—smoky, garlicky, with hints of caramel—will have your guests asking for seconds before the first plate is cleared. This isn't just another BBQ recipe; it's a celebration of Filipino flavor that belongs on any cookout menu.
For those who love leftovers (and trust me, there will be some), these ribs reheat beautifully in the oven or air fryer, making them perfect for meal prep. The marinade also works wonders on chicken thighs or pork shoulder—once you master this technique, your grill will never be the same. Let's get cooking!
Ingredients for filipino bbq pork ribs
These bold flavors transform simple ribs into a Filipino BBQ masterpiece.
| Ingredient | Amount | Notes |
|---|---|---|
| Pork Ribs (Baby Back) 🥩 | 3 lb | Bone-in, meaty cuts preferred |
| Cane Vinegar 🍶 | ½ cup | White or apple cider vinegar substitute |
| Soy Sauce 🍶 | ½ cup | Light or dark, no added sugar |
| Brown Sugar 🍚 | ½ cup | Light or dark, packed |
| Garlic Cloves 🧄 | 8 cloves | Minced for marinade |
| Fresh Ginger 🌿 | ½ cup | Grated, peeled |
| Black Peppercorns 🌶️ | 1 tbsp | Freshly cracked |
| Calamansi Juice 🍋 | ¼ cup | Substitute with lime juice |
| Olive Oil 🫒 | 2 tbsp | Extra-virgin for brushing |
| Smoked Paprika 🌶️ | 1 tsp | For smoky depth |
| Salt 🧂 | 1 ½ tsp | Diamond Crystal kosher salt |
| Green Onions 🧅 | 4 whole | Sliced, for garnish |
The ribs are the star—look for baby back cuts with good meat-to-bone ratio. Costco or Whole Foods often have the best quality, but your local butcher can trim them perfectly for you. Fresh ginger is non-negotiable here; the bright, zesty punch it adds can't be replicated with powdered. If you can't find calamansi, lime juice works perfectly—just add a pinch of salt to mimic the tartness. The soy sauce should be light-colored for this recipe, as dark varieties can make the marinade too heavy.
No cane vinegar? Apple cider vinegar or white vinegar both work—just add a splash of soy sauce to compensate for the milder acidity. Running short on time? Pre-grated ginger from the spice aisle is fine (though fresh is always better). The black peppercorns should be freshly cracked—pre-ground loses its bite quickly. For extra smokiness, swap the smoked paprika for a dash of liquid smoke, but use sparingly. The green onions are just for garnish, but they add that bright pop of color that makes the dish look restaurant-worthy.
Marinate the ribs for at least 4 hours (overnight is ideal) in the fridge. The marinade keeps for 5 days in an airtight container, so make extra for future grilling. Ribs reheat beautifully—350°F for 15 minutes in the oven with a splash of water keeps them moist. For leftovers, store in single-serving portions so you can reheat just what you need. The crispy edges? Those are best enjoyed fresh, but the tender meat stays delicious for 3 days in the fridge.
Why You'll Love This Recipe
- Fewer Ingredients, Bigger Bang: I swear by this recipe because it’s that good with just five core things—no fancy marinades or hard-to-find spices. The cane vinegar cuts through the richness of the ribs while the brown sugar caramelizes into a sticky, addictive glaze. Honestly, I’ve tried "fancier" versions, but this one hits the spot every time.
- Sweet-Savory Magic: That perfect balance of tangy vinegar, salty soy, and caramelized garlic? It’s like a flavor explosion in your mouth. The ribs get this irresistible crispy edge while staying tender inside—no dry, chewy mess here. (Yes, even on a Tuesday night.)
- Leftovers That Don’t Suck: Between us, most BBQ ribs turn into sad, dry scraps by day three. Not these. The glaze keeps them juicy, and I’ve reheated them in the oven or air fryer for days without complaint. My kids actually ask for them cold in their lunchboxes—proof they’re worth making extra.
- One-Pan, Zero Stress: I’m not kidding—this is a true set-it-and-forget-it meal. You slather the ribs, toss them on a sheet pan, and let the oven do the work. No basting, no flipping, no stress. The only cleanup is wiping down one pan, and honestly? That’s a win in my book.
Step-by-step instructions for vinegar-marinated Filipino BBQ pork ribs
Here's how to transform tough ribs into tender, crispy bites with maximum flavor.
👨🍳 Step 1: Prepare the Signature Marinade
In a large bowl, combine the 0.5 cup cane vinegar, 0.5 cup soy sauce, 0.5 cup brown sugar, 0.25 cup calamansi juice, 1 tsp smoked paprika, and 1.5 tsp salt. Whisk until the brown sugar dissolves completely—this creates a smooth, flavorful base.
Next, add the 8 cloves minced garlic and 0.5 cup grated fresh ginger. Stir in the 1 tbsp freshly cracked black peppercorns and mix well. The marinade should smell vibrant and tangy—this is your flavor foundation. Taste it now (yes, really!) to ensure the balance of sweet, sour, and umami is perfect.
🍳 Step 2: Marinate the Ribs for Maximum Tenderness
Place the 3 lb pork ribs (baby back) in a large resealable plastic bag and pour the marinade over them. Seal the bag tightly, then massage the marinade into every crevice of the ribs using your hands. This ensures even flavor penetration and helps tenderize the meat.
Refrigerate the ribs for at least 4 hours, or preferably overnight. The acidity in the vinegar and calamansi juice works its magic during this time, breaking down tough fibers. Turn the bag occasionally to ensure all surfaces are coated. Pro tip: If marinating overnight, remove the ribs from the fridge 1 hour before cooking to bring them to room temperature.
🔥 Step 3: Sear for Crispy Perfection
Preheat your grill or grill pan to medium-high heat. Remove the ribs from the marinade (reserve the marinade for basting) and pat them dry with paper towels. This step is crucial—dry ribs sear better and develop that coveted crispy bark.
Brush the ribs generously with 2 tbsp olive oil, then place them on the preheated grill. Sear for 8-10 minutes per side, basting frequently with the reserved marinade. You're looking for deep golden-brown color and visible grill marks—this is where the magic happens. The ribs should be sizzling vigorously, but don't rush this step. Patience here ensures that crispy exterior we're after.
⏰ Step 4: Slow Cook for Juicy Tenderness
Once the ribs are well-seared, reduce the heat to medium-low (around 275°F). Continue cooking for 1.5-2 hours, basting every 20 minutes with more marinade. The ribs are done when they reach an internal temperature of 195-203°F and the meat pulls apart easily with two forks.
Here's where the real transformation happens—the slow cooking breaks down collagen into gelatin, making the ribs fork-tender while maintaining that crispy exterior. If the marinade starts to dry out, add a splash of water or apple cider vinegar to prevent burning. The ribs should be glossy and caramelized, with a beautiful mahogany color.
🍽️ Step 5: Rest and Garnish for Presentation
Transfer the ribs to a cutting board and let them rest for 10-15 minutes before slicing. This resting period allows the juices to redistribute throughout the meat, ensuring each bite is moist and flavorful. While they rest, slice the 4 whole green onions into ¼-inch rounds for garnish.
Slice the ribs between the bones into 1-inch pieces, discarding any large bones. Arrange the sliced ribs on a serving platter, drizzle with any remaining marinade from the pan, and sprinkle with the sliced green onions. The contrast of the crispy edges and tender meat with the bright green garnish makes this dish visually stunning. Serve immediately with steamed rice to soak up all that delicious sauce!
Pro Tips For Making Filipino Bbq Pork Ribs
- Blister the Garlic First: Toss whole garlic cloves in the marinade raw, but sear them first—cut-side down in a dry pan for 30 seconds until fragrant. I learned this the hard way: raw garlic just sits there, but toasted cloves release their flavor deep into the ribs while caramelizing slightly. The vinegar and soy sauce will mellow them out, but that initial punch makes the sauce taste like it simmered for hours. ---
- Don’t Crowd the Pan: Cook ribs in batches if your pan’s smaller than the rack—even if it means an extra 10 minutes. I used to jam them all in, and the steam turned the sugar into a sticky glaze that burned before the ribs got tender. Space them out so the edges crisp while the meat stays juicy. Think "golden gaps," not "pork pile." ---
- Simmer Low and Slow: After the initial sear, drop heat to medium-low and let the ribs bubble gently for at least 45 minutes. I once rushed it to save time, and the sauce turned thin and cloying instead of rich and sticky. The cane vinegar needs time to mellow, and the sugar to dissolve evenly—no shortcut here. ---
- Save the Vinegar for Last: Add cane vinegar only in the final 10 minutes of cooking. Too early, and the acidity will toughen the meat. I was skeptical—what if it doesn’t mellow?—but it works: the ribs stay tender while the vinegar brightens the sauce just enough to cut through the sweetness. Trust the timing.
Pro cooking tips for this recipe
Marinade Magic
The real secret to these ribs isn't the grill—it's the marinade. I've found that cane vinegar is non-negotiable for that authentic tang, but if you're in a pinch, apple cider vinegar works just fine. The key is to massage the marinade into every crevice of the ribs using your hands—this isn't just for flavor, it's for tenderness. I like to add a splash of calamansi juice (or lime) because that bright acidity cuts through the richness of the pork. Pro tip: Taste your marinade before using it—it should balance sweet, sour, and umami perfectly. If it's too strong, add a pinch more sugar; if it's too mild, a splash of vinegar. 🍋
Two-Zone Grilling
This is where most home cooks mess up. You need two heat zones—one hot for searing, one medium for slow cooking. Start by searing the ribs over direct heat at 450°F for 8-10 minutes per side to get that crispy bark. Then, move them to indirect heat at 275°F and let them cook low and slow. I use a charcoal grill for this because it gives me better temperature control, but a gas grill with a heat diffuser works too. The goal is to keep the ribs glossy and caramelized, not charred. 🔥
Basting Like a Pro
Don't just toss marinade on the ribs and walk away. Baste every 20 minutes with a basting brush or spoon—this keeps them moist and builds layers of flavor. I like to add a splash of soy sauce to the reserved marinade while basting to enhance the umami. The ribs should be sizzling gently when you baste them, not smoking furiously. If they start to dry out, add a little water or vinegar to the pan to keep them juicy. This is where the real transformation happens—the slow cooking breaks down collagen into gelatin, making the meat fork-tender. 💫
Resting is Non-Negotiable
I can't stress this enough—resting the ribs for 10-15 minutes before slicing is the difference between dry, sad meat and melt-in-your-mouth perfection. This lets the juices redistribute throughout the meat. While they rest, slice the green onions into thin rounds for garnish. They add a fresh pop of color and a mild onion bite that cuts through the richness. Trust me, skipping the rest will leave you with ribs that fall apart when you try to serve them. 🧅
Equipment Must-Haves
You don't need a fancy setup, but a few tools make this recipe foolproof. A meat thermometer is non-negotiable—aim for 195-203°F internal temperature. I use a ThermoWorks Smoke because it's reliable and easy to read. For grilling, a cast iron grill pan works great if you don't have an outdoor grill. And always keep paper towels handy to pat the ribs dry before searing—that crispy bark won't form if they're wet. 🔥
Leftovers? No Problem
These ribs reheat beautifully, but the key is to do it right. 350°F for 15 minutes in the oven with a splash of water keeps them moist. For extra crispiness, broil for the last 2 minutes. Store leftovers in an airtight container for up to 3 days in the fridge. The crispy edges won't be as perfect, but the meat stays tender and flavorful. I like to reheat just what I need for the next day's lunch—this way, the ribs stay fresh and delicious. ❄️
Nutrition facts
Frequently asked questions
Can I use regular pork ribs instead of baby back ribs?
Yes, but with adjustments! For St. Louis-style spare ribs, increase marinating time to 6-8 hours (or overnight) since they're tougher. Trim excess fat and membrane first for even cooking. The recipe still works, but expect slightly longer grilling time—about 2.5-3 hours total.
What's the best substitute if I can't find calamansi?
Use a mix of lime juice (¼ cup) + ½ tsp salt to mimic calamansi's tartness. For extra depth, add 1 tsp fish sauce (Filipino staple) to the marinade. The combination balances the sweet-savory notes perfectly—just taste and adjust before marinating.
How do I prevent the ribs from sticking to the grill?
Pat ribs completely dry with paper towels before grilling—moisture causes sticking! Brush with olive oil after searing, then let sit 3-5 minutes on the grill to form a crust. For extra insurance, sprinkle grill grates with coarse salt before placing ribs on.
Can I make these ribs in the oven instead of on a grill?
Preheat oven to 375°F and use a cast iron skillet or baking sheet. Sear ribs in the skillet first, then transfer to oven for 2-2.5 hours, basting every 30 minutes. Finish under broiler for 2-3 minutes to crisp edges. The texture will be slightly different but still delicious.
What sides pair best with these ribs?
Classic Filipino pairings include steamed jasmine rice, atchara (pickled papaya), and garlic vinegar (sinigang-style). For a modern twist, try grilled pineapple slices or cucumber salad with rice vinegar. The tangy sides cut through the ribs' richness beautifully.