
Main Courses
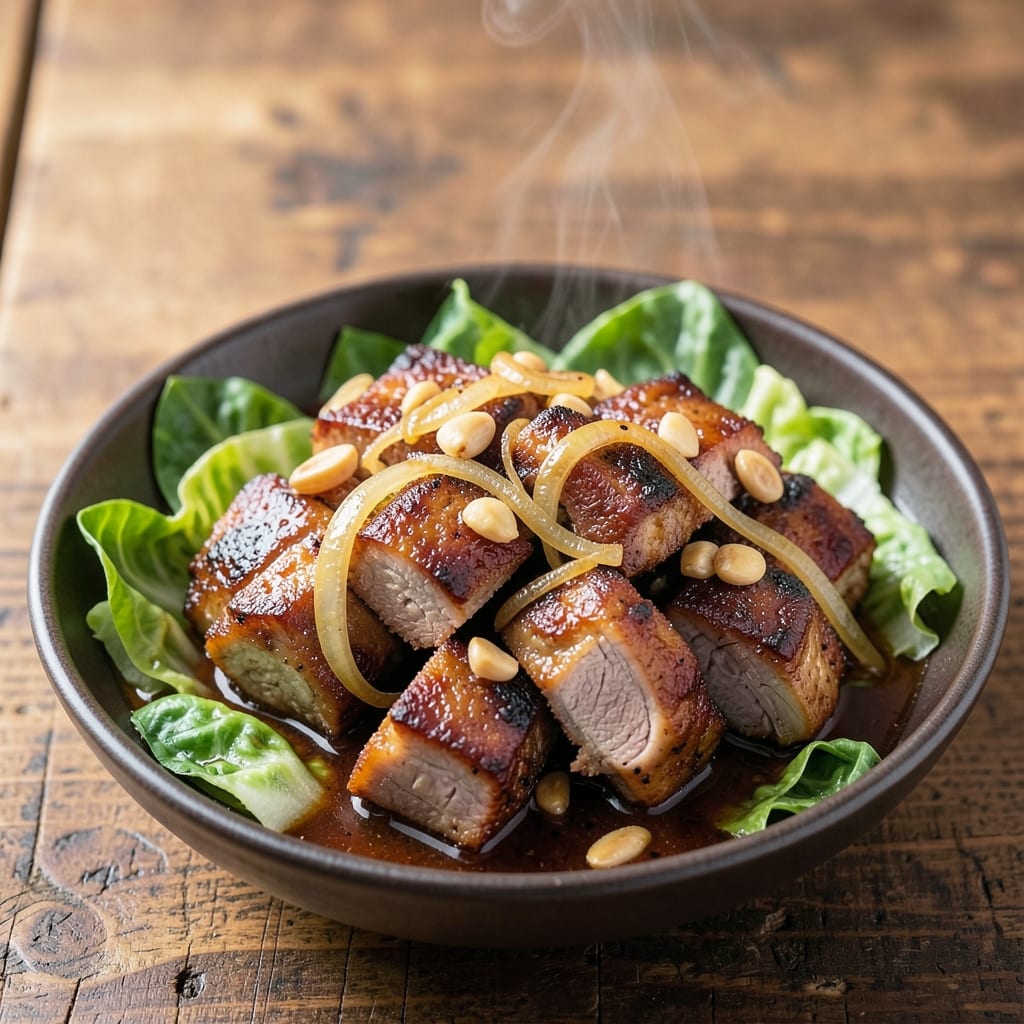
This Filipino pork and cabbage recipe delivers the perfect balance of crispy edges and tender meat, infused with the tangy brightness of vinegar and the deep umami of soy sauce. Growing up in Georgia, I first tasted this dish at a Filipino restaurant in Atlanta, and it became an instant favorite—especially during family gatherings where pork was always the star. The secret lies in marinating the pork just right and braising it until the cabbage softens into sweet, caramelized perfection.
The dish starts with a simple marinade of soy sauce, vinegar, and garlic that tenderizes the pork while building layers of flavor. As the pork sears in the pan, those crispy edges form, locking in juices that keep the meat succulent. The cabbage cooks down slowly, absorbing the rich, savory sauce while developing a natural sweetness that balances the dish's tangy notes. This method ensures every bite delivers that satisfying contrast—crunchy exterior, melt-in-your-mouth interior.
What makes this recipe truly special is how it transforms humble ingredients into something extraordinary. The pork becomes fork-tender without falling apart, while the cabbage develops a delicate sweetness that pairs beautifully with the vinegar's sharpness. Serve it over steamed rice to soak up every last drop of that flavorful sauce, or pair it with a side of garlic fried rice for a complete meal. The aroma alone will have everyone at the table asking for seconds.
This dish is perfect for weeknight dinners or special occasions—it's hearty enough to satisfy a crowd but simple enough to prepare in one pot. The technique is foolproof once you master the braising time, and the flavors only deepen as it sits, making leftovers just as delicious as the first serving. Let's get cooking!
Ingredients for filipino pork and cabbage
Six simple ingredients transform into a restaurant-worthy Filipino pork and cabbage dish.
| Ingredient | Amount | Notes |
|---|---|---|
| Pork Shoulder 🥩 | 2 ½ lb | Cut into 1.5-inch cubes |
| Green Cabbage 🥬 | 1 small head | Cut into wedges, core removed |
| White Vinegar 💧 | ½ cup | White or cane vinegar |
| Soy Sauce 🥄 | ½ cup | Light or regular soy sauce |
| Garlic Cloves 🧄 | 6 cloves | Minced or finely chopped |
| Yellow Onion 🧅 | 1 whole | Sliced into half-moons |
| Brown Sugar 🍚 | 2 tbsp | Light or dark brown sugar |
| Black Peppercorns 🌶️ | 1 tsp | Crushed or ground |
| Bay Leaves 🌿 | 2 whole | Dried, removed before serving |
| Vegetable Oil 🫒 | 2 tbsp | For searing pork |
| Salt 🧂 | 1 ½ tsp | Kosher or sea salt |
| Water 💧 | 1 cup | For braising liquid |
The pork shoulder is the star here—look for well-marbled cuts at your local butcher or grocery store's meat department. Costco or Trader Joe's often have pre-cut pork shoulder that saves time. If you can't find it, pork butt works just as well. The cabbage should be firm with crisp leaves—avoid any with yellowing or wilted spots. For the vinegar, white vinegar is traditional, but cane vinegar adds a subtle sweetness that some prefer. The soy sauce matters too—light soy for milder flavor, dark soy for deeper color.
No brown sugar? White sugar works in a pinch, though it won't caramelize as beautifully. Running short on bay leaves? Dried thyme at half the amount gives a similar earthy depth. The garlic can be minced with a knife or pulsed in a food processor for consistency. For the onion, yellow or red both work, but yellow has a slightly sweeter flavor. If you're using pre-minced garlic from a jar, rinse it first to remove excess salt and preservatives. The pork cubes should be evenly sized—about 1.5 inches—for consistent cooking.
This dish tastes even better the next day as flavors meld. Store leftovers in an airtight container in the fridge for up to 5 days. For longer storage, freeze portions for 3 months. The cabbage will soften further when reheated, so slightly undercook it initially if you prefer a bit of crunch. To serve, spoon the pork and cabbage over steamed rice—jasmine rice pairs perfectly with the tangy-savory sauce. The sauce thickens as it cools, so add a splash of water when reheating if needed.
Why You'll Love This Recipe
- One-Pan Magic: I swear by this—no chopping boards, no extra pots. You brown the pork, toss in the cabbage wedges whole, and let the vinegar and soy sauce work their magic. The cabbage softens perfectly without falling apart, and the pork stays juicy. (Yes, even on a Tuesday night when I’m exhausted.)
- Tangy-Savory Balance: That vinegar cut? It’s the star. It brightens the rich pork and cuts through the cabbage’s earthiness, while the soy sauce adds depth without overpowering. Honestly, the garlic cloves sizzling in the pan make my whole kitchen smell like a comfort food hug.
- Leftover Goldmine: This dish begs to be made in bulk. The flavors only get better the next day—tender pork, slightly crispy edges, and cabbage that’s just right. I freeze portions for lazy days or pack it for work; it reheats like a dream. (My daughter picks out the best pieces first, but still asks for seconds.)
- Budget-Friendly Feast: Pork shoulder is cheap, cabbage lasts forever, and you’re using pantry staples. For under $10, you feed four people a meal that feels special. Between us, it’s my go-to when I want to impress guests without breaking the bank—or when I just don’t feel like grocery shopping for fancy ingredients.
Step-by-step instructions for vinegar-braised pork shoulder
Transform tough pork into melt-in-your-mouth tenderness with this precise braising method.
Sear the Pork Shoulder for Maximum Flavor
Heat a large Dutch oven over medium-high heat and add the 2 tablespoons vegetable oil. Once the oil shimmers, add the 2.5 lb pork shoulder cut into 1.5-inch cubes in a single layer. Let them sear undisturbed for 3-4 minutes until deep golden brown forms on all sides.
This initial searing creates the Maillard reaction that builds deep flavor. I work in batches if needed to avoid crowding the pan—pork releases moisture that steams instead of browns. Once all pieces are seared, remove them and set aside on a plate.
Build the Aromatic Base
In the same Dutch oven, add the 1 whole yellow onion sliced into half-moons and the 6 cloves garlic cloves minced. Cook for 3-4 minutes until the onions soften and turn translucent, stirring occasionally. Add the 2 tablespoons brown sugar and cook for another 1 minute to caramelize slightly.
This step develops the sweet-savory foundation of the dish. The caramelized onions and garlic will infuse the braising liquid with complex flavors. I like to press down gently on the onions with a wooden spoon to help them break down faster.
Deglaze and Combine All Ingredients
Pour in the 0.5 cup white vinegar and 0.5 cup soy sauce immediately after removing the pan from heat. Scrape up all the browned bits from the bottom with a wooden spoon—these contain concentrated flavor. Return to medium heat and let it simmer for 2 minutes until slightly reduced.
Add the seared pork back to the pot along with the 1.5 teaspoons salt, 1 teaspoon crushed black peppercorns, and 2 whole bay leaves. Pour in the 1 cup water and bring to a gentle simmer. The liquid should come about halfway up the pork pieces.
Braise Until Fork-Tender
Cover the Dutch oven tightly and transfer to a 325°F oven. Braise for 2.5 to 3 hours until the pork is fork-tender and the meat easily pulls apart. I check at the 2-hour mark—the meat should be falling off the bone when tested with a fork.
Resist the urge to peek or stir during cooking. The tight lid traps steam that tenderizes the meat while the vinegar and soy sauce work together to create that signature tangy-sweet flavor. If the liquid reduces too much before the pork is tender, add 2-3 tablespoons water through the vent in the lid.
Finish with Cabbage and Serve
Remove the pork from the braising liquid and transfer to a serving platter. Strain the cooking liquid through a fine-mesh sieve into a clean saucepan and bring to a simmer over medium heat. Add the 1 small head green cabbage cut into wedges and cook for 8-10 minutes until just tender but still holding its shape.
Return the pork to the cabbage and sauce, tossing gently to coat. The cabbage should absorb the rich, tangy flavors of the braising liquid. Serve immediately with steamed rice to soak up every delicious bite. The pork should be fork-tender with crispy edges, while the cabbage remains crisp-tender with just a hint of bite.
Pro Tips For Making Filipino Pork And Cabbage
- USE A DUTCH OVEN: Start with a screaming-hot pan—cast iron if you have it—and sear the pork shoulder until it releases easily from the pan. That crust locks in flavor and keeps the meat from drying out later. (Yes, even if you're impatient like me.)
- CHOP CABBAGE SMALL: Cut the cabbage into 1-inch chunks, not thick wedges. Smaller pieces soften faster and absorb the porky, vinegary sauce better. I used to leave them too big, and they’d end up undercooked or soggy.
- ACIDIFY GRADUALLY: Don’t dump all the white vinegar at once—add half first, let it cook down for 5 minutes, then add the rest. This keeps the pork tender instead of toughening it from the acid shock. I learned this the hard way after serving rubbery meat.
- GARLIC: MINCE, DON’T CHOP: Finely mince the garlic (almost paste-like) so it blends into the sauce instead of sitting as chunks. Overcooked garlic turns bitter, and minced garlic disappears into the flavor without overpowering. (No, a food processor doesn’t count—do it by hand.)
Storing and reheating your leftovers
Refrigerator Storage
Let your Filipino pork and cabbage cool completely before storing—this prevents condensation that makes the cabbage soggy. Transfer to an airtight container with a lid, pressing the cabbage down slightly to preserve its texture. Store in the fridge for up to 5 days, though I always find it tastes even better the next day as the flavors meld. The pork stays fork-tender, and the cabbage develops a subtle sweetness from the braising liquid. 💛
Freezer-Friendly Tips
For longer storage, freeze portions in quart-sized freezer bags with 1 inch of headspace—this prevents ice crystals from damaging the cabbage. Label with the date and freeze for up to 3 months. When reheating from frozen, add 2 tablespoons water to the pan to prevent sticking. I swear by this method for quick weeknight meals after a long day at the farm.
Stovetop Reheating
My preferred method is stovetop reheating—it preserves the crispy edges of the pork and keeps the cabbage just tender. Heat over medium-low heat with 2 tablespoons water to loosen the sauce. Cover and simmer for 10-12 minutes, stirring occasionally. If the sauce thickens too much, add 1 tablespoon water at a time. The pork should reach 165°F internally for safety. ✨
Microwave Shortcuts
For a quick fix, transfer to a microwave-safe dish with a splash of water, cover loosely, and heat on 50% power for 3-4 minutes. Stir halfway through to redistribute the sauce. The cabbage will soften further, but the pork stays juicy. I only use this method when I'm truly in a rush—it's not as perfect as stovetop, but it works in a pinch.
Sauce Rescue
If your reheated dish seems dry, don't toss it! Stir in 1 tablespoon soy sauce and 1 teaspoon vinegar to revive the tangy depth. For extra richness, add 1 tablespoon water and simmer for 2 minutes. The pork absorbs the sauce beautifully, and the cabbage plumps up again. This trick saves countless leftovers in my kitchen. 💡
Serving Leftovers
For a restaurant-style presentation, spoon the reheated pork and cabbage over steamed jasmine rice, drizzling any extra sauce on top. Garnish with sliced green onions for freshness. I often serve this as a lunch the next day—it's hearty enough to stand alone or pair with a simple cucumber salad for balance. The contrast of warm pork with cool cucumber is pure comfort food. 🌱
Nutrition facts
Frequently asked questions
Can I use pork chops instead of pork shoulder?
Pork chops won't work as well because they're too lean and cook much faster than pork shoulder. For best results, stick with pork shoulder or pork butt—these cuts have enough fat and connective tissue to become tender during braising. If you're set on using chops, marinate them for 2 hours first and cook them separately for 10-12 minutes on the stovetop after adding the cabbage.
How do I adjust the recipe for a slower cooker?
Transfer the seared pork, onions, garlic, and spices to your slow cooker. Add the vinegar, soy sauce, water, and cabbage. Cook on low for 6-7 hours or high for 3-4 hours until the pork is fork-tender. The cabbage will soften more in a slow cooker, so add it only in the last 30 minutes if you prefer it slightly crisp.
Can I make this dish spicier?
Add 1-2 teaspoons of chili flakes or 1 sliced chili pepper (like siling labuyo) when you deglaze with vinegar. For extra heat, stir in 1 teaspoon of ground black pepper or a dash of cayenne. Remember, the flavors deepen as it cooks, so start with less if you're sensitive to spice.
What if my cabbage is too tough after cooking?
This usually happens if the cabbage was overcooked. Next time, add it to the braising liquid only in the last 10 minutes of cooking. For tough cabbage, try shredding it thinner or cutting into smaller wedges. A quick fix is to sauté it separately in a pan with a splash of vinegar and soy sauce for 5-7 minutes until tender.
Can I substitute cabbage with another vegetable?
Green cabbage is traditional, but you can use Napa cabbage or Chinese cabbage for a milder flavor. For a different texture, try bok choy or broccoli florets—they'll cook faster, so add them in the last 5-7 minutes. Avoid leafy greens like spinach, as they'll turn mushy.