
Main Courses
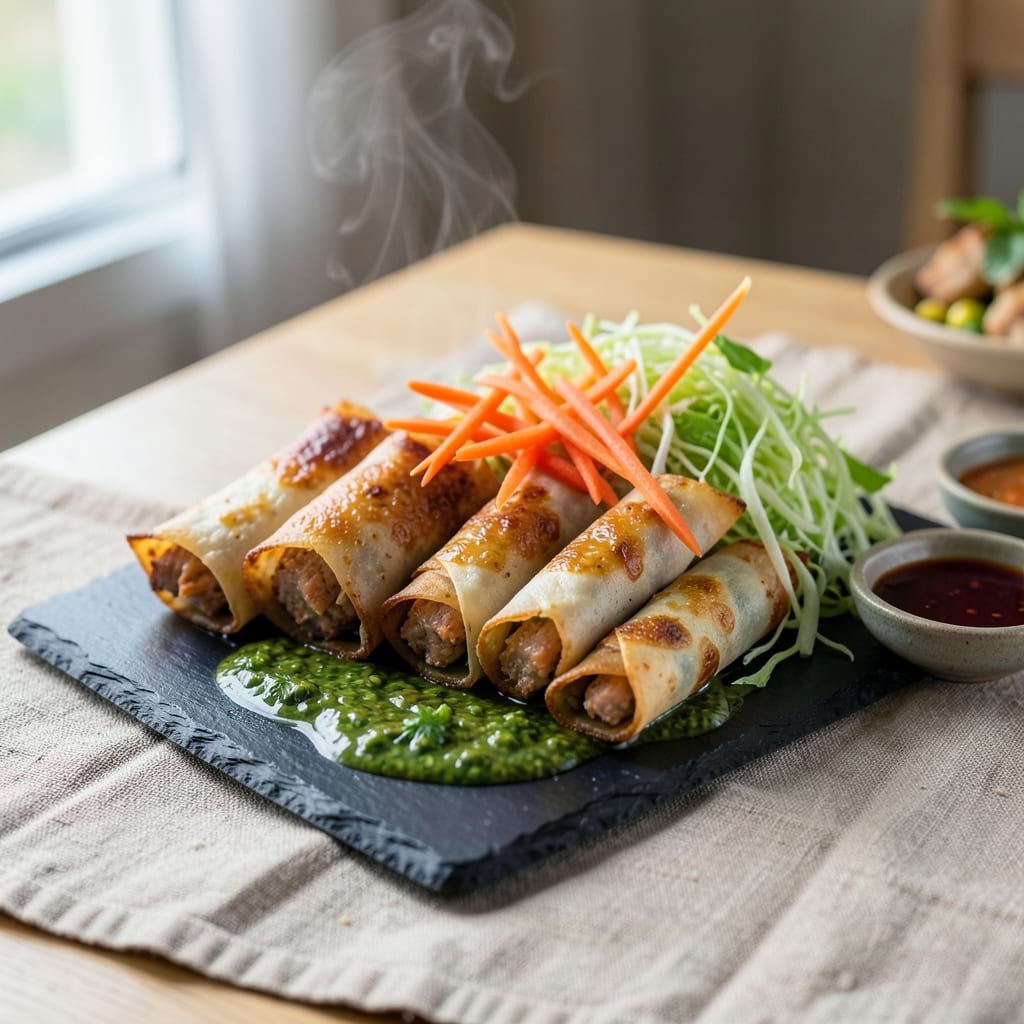
This Filipino Pork Lumpia Shanghai recipe brings the vibrant flavors of Filipino-Chinese fusion to your kitchen with its signature crispy spring rolls. 🔥 The secret lies in the sweet-savory pork filling—ground pork simmered with garlic, ginger, and soy sauce—wrapped in delicate spring roll wrappers and fried to golden perfection. As someone who's spent years perfecting pork dishes, I can tell you this recipe delivers that satisfying crunch and melt-in-your-mouth texture every time.
The beauty of Lumpia Shanghai is in its balance—sweet from the pork filling, savory from the soy sauce, and crispy from the perfect fry. I've streamlined the process so you can make these from scratch without the fuss, using simple ingredients that come together in layers of flavor. The key is getting the filling just right: tender pork mixed with finely chopped vegetables and seasoned to taste, then wrapped tightly for that signature shape.
What you'll end up with is a plate of golden, crispy spring rolls that shatter slightly at the edges while staying tender inside. Serve with a simple soy-vinegar dipping sauce to cut through the richness, and watch as everyone reaches for seconds. This dish is perfect for gatherings, potlucks, or a special weeknight dinner that feels like a celebration.
Once you master the technique, you can experiment with variations—adding shrimp to the filling or using air frying for a lighter version. The possibilities are endless, but the foundation remains the same: crispy, flavorful, and impossible to resist. Let's get cooking!
Ingredients for filipino pork lumpia shanghai
Sweet-savory pork filling and delicate wrappers—just eight core ingredients for golden, crispy perfection.
| Ingredient | Amount | Notes |
|---|---|---|
| Ground Pork 🥩 | 1 lb | Lean or regular, finely chopped |
| Spring Roll Wrappers 🍡 | 12 pieces | Square, thin wrappers (10x10 inches) |
| Garlic Cloves 🧄 | 4 cloves | Minced, fresh preferred |
| Carrots 🥕 | 1 medium | Julienned into thin matchsticks |
| Green Cabbage 🥬 | 2 cups | Finely shredded, core removed |
| Fresh Ginger 🌿 | 1 inch | Grated, peeled |
| Soy Sauce 🍶 | 2 tbsp | Light or all-purpose |
| Oyster Sauce 🍶 | 1 tbsp | For depth of flavor |
| Sesame Oil 🫒 | 1 tbsp | Toasted, for aroma |
| Vegetable Oil 🫒 | 3 cups | For deep frying (high smoke point) |
| Salt 🧂 | ½ tsp | Kosher or sea salt |
| Black Pepper 🌶️ | ¼ tsp | Freshly ground |
| Sugar 🍚 | 1 tbsp | White granulated |
| White Vinegar 💧 | 2 tbsp | For dipping sauce |
| Canola Oil 🫒 | 2 tbsp | For dipping sauce |
The ground pork is non-negotiable here—look for 80/20 fat ratio if available, but regular works too. Filipino markets often have the best quality, but any grocery store's ground pork will do. The spring roll wrappers? Golden Gate or King Noodle are my go-tos—they're sturdy enough for frying without tearing. If you can't find them, Asian grocery stores usually stock them in the freezer section. Fresh ginger and garlic are a must for that authentic flavor punch—don't use powdered substitutes. For the carrots and cabbage, julienne the carrots and finely shred the cabbage—this ensures even cooking and that satisfying crunch.
No soy sauce? Substitute with coconut aminos, though the flavor will be slightly different. Short on oyster sauce? Mushroom sauce or a bit more soy sauce works in a pinch. The sesame oil adds that signature aroma—toasted sesame oil is best, but regular will do. For the frying, vegetable or peanut oil works best due to their high smoke points. The dipping sauce is simple: mix vinegar, sugar, and canola oil. If you want extra richness, add a dash of chili crisp or sriracha for heat. The sugar in the dipping sauce balances the savory filling perfectly—don't skip it.
Spring roll wrappers keep best in the freezer, so transfer them to a sealed bag once you bring them home. They'll stay fresh for up to 3 months. The pork filling can be prepped a day ahead—store it in an airtight container in the fridge and assemble the lumpia just before frying. These reheat surprisingly well—air fry at 375°F for 3-4 minutes to restore the crunch. For leftovers, store them in a single layer with parchment paper between each to keep them from sticking. They'll stay crispy for 2 days this way.
Why You'll Love This Recipe
- No Fuss Assembly: I swear by this recipe—just mix the ground pork with minced garlic, shredded carrots, and cabbage, then fold into those wrappers faster than you can say lumpia. No fancy knife skills, no stress, just crispy golden pockets in minutes.
- Garlic-Caramel Magic: Between us, the garlic here isn’t just background flavor—it’s the star. Lightly fried until fragrant, it melts into the pork filling, balancing the crunch of the wrapper and the sweetness of the veggies. Honestly, the first bite makes me close my eyes.
- Leftover Hero: These freeze like a dream—just reheat in a skillet or air fryer, and they’re back to crispy perfection. I make a double batch on Sundays because they’re my go-to for lazy weeknights or last-minute potlucks. No one ever turns them down.
- Pantry Staple Power: Ground pork, carrots, cabbage—ingredients you already have. Spring roll wrappers? Sold at every Asian market or even the grocery freezer aisle. This is the kind of recipe that won’t break the bank or leave you scrambling for obscure items.
Step-by-step instructions for Filipino pork lumpia Shanghai
Let's whip up these golden, crispy spring rolls with a sweet-savory filling that'll have everyone reaching for seconds.
👨🍳 Step 1: Prepare the Filling with Perfect Balance
In a large mixing bowl, combine the 1 lb ground pork, 4 cloves minced garlic, 1 inch grated ginger, 0.5 tsp salt, 0.25 tsp black pepper, and 1 tbsp sugar. Mix gently until just combined—overworking will make the filling tough.
Add the 1 medium julienned carrots and 2 cups finely shredded green cabbage, tossing lightly to distribute the seasonings. The cabbage should remain crisp, not wilted. Here's the thing—don't skip the sugar. It balances the savory flavors and caramelizes slightly during frying, adding depth.
In a small bowl, whisk together 2 tbsp soy sauce, 1 tbsp oyster sauce, and 1 tbsp sesame oil. Pour this mixture over the pork filling and stir gently to coat evenly. Let it sit for 10 minutes while you prep your workspace—this allows the flavors to meld.
🥘 Step 2: Assemble the Spring Rolls Like a Pro
Place one spring roll wrapper in front of you with the corner closest to you. Spoon about 2 tablespoons of the pork filling onto the wrapper, about 1 inch from the bottom edge. Here's where it gets fun—fold the bottom corner up to cover the filling, then fold in the left and right sides like an envelope.
Roll tightly from the bottom up, keeping the seam sealed with a tiny dab of water if needed. I like to press down gently as I roll to prevent air pockets. Place the finished lumpia seam-side down on a plate covered with a damp paper towel—this prevents them from drying out while you assemble the rest.
Work quickly but carefully—you'll have about 12 lumpia to assemble. If the wrappers feel stiff, dip your fingers in water to soften them slightly. The goal is neat, compact rolls that'll fry evenly and stay crispy.
🔥 Step 3: Fry to Crispy Perfection (The Moment That Matters)
Fill a deep fryer or heavy pot with 3 cups vegetable oil and heat to 350°F. Use a deep-fry thermometer—this is critical for even cooking. When the oil is ready, you'll see small bubbles around the thermometer and it should be shimmering but not smoking.
Carefully lower 4-5 lumpia at a time into the hot oil using a slotted spoon or tongs. Don't overcrowd—they need room to crisp up properly. Fry for 3-4 minutes until they turn a beautiful golden brown color. Here's the key: they should float when done—they'll be properly cooked inside.
Transfer the fried lumpia to a paper towel-lined plate and let them drain for 2-3 minutes. Keep the oil at 350°F for the next batch. The lumpia will stay crispy if you don't let them sit too long—serve them immediately while they're still hot and crunchy.
🍽️ Step 4: Make the Dipping Sauce and Serve
While the lumpia fries, whisk together 2 tbsp canola oil, 2 tbsp white vinegar, and 1 tsp sugar in a small bowl. This tangy, slightly sweet sauce cuts through the richness of the fried pork. Taste and adjust—you might want to add a pinch more sugar or vinegar to balance the flavors.
Arrange the crispy lumpia on a serving platter and drizzle any remaining oil from the filling over the top for extra flavor. Serve immediately with the dipping sauce on the side. The contrast of the warm, crispy spring rolls with the cool, tangy sauce is what makes this dish so irresistible.
For the best experience, serve with a side of sliced cucumbers or sweet chili sauce to complement the pork filling. And here's my pro tip: if you're making these ahead, fry them just before serving—they lose crispness as they cool.
Pro Tips For Making Filipino Pork Lumpia Shanghai
- SEAR THE GARLIC: Use a separate pan for the garlic—just 30 seconds over medium-high heat until it’s golden but not burnt. I learned this the hard way: letting it sit too long turns it bitter, and that flavor sneaks into your filling.
- SHRED CABBAGE DRY: Toss the cabbage in a towel and squeeze out every drop of water before chopping. Wet cabbage makes wrappers soggy, and nobody wants limp lumpia. (Yes, even if you’re impatient like me.)
- DON’T OVERFILL WRAPPERS: Pack the filling snug but not stuffed—leave at least an inch of empty space at the edges. Overstuffing cracks the wrapper when frying, and no one wants to fish out broken pieces mid-bite.
- REST THE FILLING: Let the pork-carrot-cabbage mix sit for 10 minutes after mixing. The flavors meld better, and the cabbage softens just enough to avoid a crunchy bite. (Your future self will thank you.)
Wine and beer pairings for filipino pork lumpia shanghai
Filipino-Inspired Reds
For these rich, savory spring rolls, I reach for Filipino-friendly reds that complement the pork's depth without overwhelming the delicate wrappers. A light-bodied Tempranillo from Spain—like Bodegas Muga Reserva—works beautifully with its bright acidity and subtle earthiness. The wine's red fruit notes mirror the caramelized pork filling, while its smooth tannins won't clash with the crispy texture. 🍷
If you prefer something more aromatic, try a Pinot Noir from the Willamette Valley. Its berry-forward profile and silky finish enhance the soy and sesame flavors in the filling. I've found that Oregon Pinots often have a touch of spice that pairs wonderfully with the ginger and garlic in the recipe.
Crisp Whites for Balance
Don't underestimate the power of a crisp white when it comes to cutting through fried foods. A dry Riesling from Germany—like Dr. Loosen Blue Slate—brings bright acidity and citrus notes that cleanse your palate between bites. The slight sweetness in some Rieslings also complements the sugar in the dipping sauce. 🍷
For a more approachable option, try a Sauvignon Blanc from New Zealand's Marlborough region. Its zesty lime and herbaceous notes create a refreshing contrast to the pork's richness. I like to serve this with a squeeze of lemon on the side to enhance the wine's natural citrus character.
Local Lager Pairings
When wine feels like too much effort, I always turn to Filipino-style lagers that bridge the gap between East and West. A San Miguel Pale Pilsen—the classic Filipino beer—is my go-to choice. Its crisp, slightly malty profile and subtle sweetness mirror the lumpia's flavors while providing a refreshing contrast. The carbonation also helps cut through the richness of the fried filling. 🍺
For a craft beer alternative, try a Belgian Witbier like Hoegaarden. The coriander and orange peel notes in these beers complement the sesame and ginger in the pork filling, while the effervescence keeps the palate fresh. I've found that serving these beers slightly chilled enhances their crispness and makes them even more refreshing.
Non-Alcoholic Options
For those who prefer not to drink, I always recommend a sparkling yuzu soda like San Pellegrino Aranciata Rossa. The citrusy notes and effervescence provide the same refreshing contrast as wine or beer without the alcohol. The bubbles also help cleanse the palate between bites of crispy lumpia. 💧
Another great option is Filipino-style iced tea made with hibiscus flowers and lemongrass. This traditional drink—often called salabat—has a tart, slightly sweet profile that pairs beautifully with the savory pork filling. You can find hibiscus tea bags at most Asian markets or make your own by steeping dried hibiscus flowers in hot water with a touch of sugar.
Nutrition facts
Frequently asked questions
Can I use chicken instead of pork for these lumpia? You can absolutely substitute chicken for pork! Ground chicken works beautifully here—just
How do I prevent my lumpia from unraveling while frying?
Tight wrapping is key! Seal each lumpia with a small dab of water along the edges before rolling, then press gently as you go. Avoid overfilling—2 tablespoons per wrapper is perfect. If wrappers feel stiff, dip your fingers in water to soften them. Fry at 350°F and don't overcrowd the pot—they'll stay together better with proper oil circulation.
Can I make Lumpia Shanghai ahead of time?
Yes, but fry them fresh for best results! Assemble the lumpia up to 24 hours ahead and refrigerate uncooked (sealed in plastic wrap). For leftovers, store fried lumpia in a single layer with parchment between each to maintain crispness. Reheat in an air fryer at 375°F for 3-4 minutes or fry again briefly in oil. They won't be as crispy as fresh, but still delicious.
What's the difference between Lumpia Shanghai and regular lumpia?
Lumpia Shanghai is the fried version of lumpia, while regular lumpia (like lumpia sari-sari) are often steamed or boiled. The Shanghai version gets its name from its golden, crispy exterior and is typically larger and more rectangular. The filling is also slightly sweeter with pork as the star—classic lumpia might use shrimp or veggies instead.
Can I bake or air fry these instead of deep frying?
For air frying, brush assembled lumpia with 1 tablespoon oil and cook at 375°F for 8-10 minutes, flipping halfway. For baking, place on a wire rack over a baking sheet, brush with oil, and bake at 400°F for 15-18 minutes. They won't be as crispy as fried, but still delicious. The filling will be more tender—great for a lighter version!