Main Courses
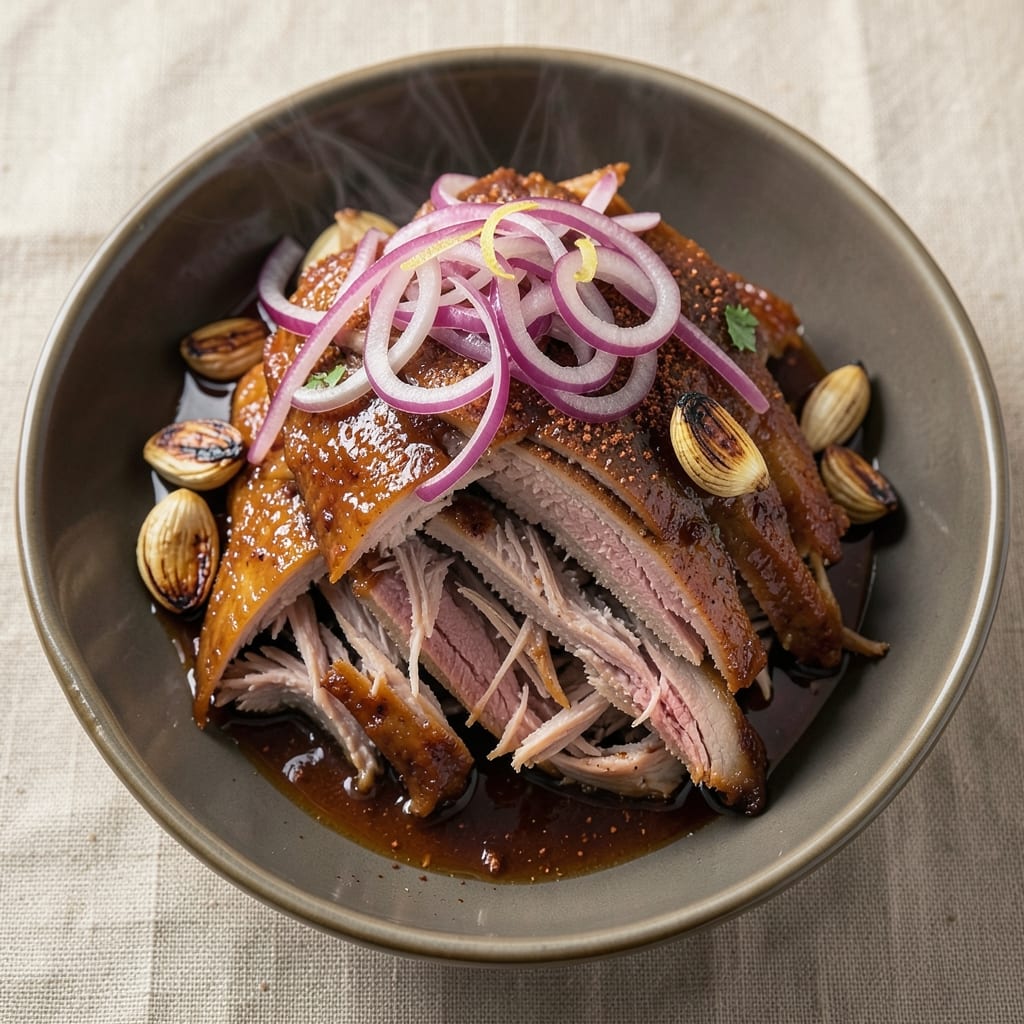
This five-star pulled pork recipe delivers the kind of melt-in-your-mouth tenderness and smoky crust that wins BBQ competitions. After years of perfecting this technique—from brining to smokehouse finish—I can confidently say this is the closest you'll get to award-winning pulled pork at home. The secret lies in patience: letting the pork shoulder cook low and slow until it reaches that ideal 195–203°F internal temperature where collagen transforms into irresistible silkiness.
What sets this recipe apart is the balance of texture and flavor. The bark develops a deep, caramelized crust from the smoker, while the interior becomes so tender it practically shreds with a fork. I use a dry rub with just enough spice to enhance the natural sweetness of the meat, and a touch of apple juice in the cooking liquid keeps it moist without overwhelming the smoky profile. This isn't just pulled pork—it's a restaurant-quality centerpiece that commands attention at any table.
The magic happens during the final stages when the pork rests, allowing those juices to redistribute. That's when you'll know it's ready: the meat pulls apart effortlessly, coating your fingers in succulent, flavorful strands. Serve it on toasted buns with a drizzle of tangy vinegar-based sauce, or let guests build their own plates with coleslaw and pickles. Every bite delivers that perfect harmony of smoky, sweet, and slightly spicy notes that make this a crowd-pleaser.
Whether you're hosting a backyard BBQ or treating yourself to a Sunday feast, this recipe delivers professional results without requiring a commercial smoker. The techniques I've perfected over years of competition cooking—from proper brining to temperature control—ensure you'll achieve that five-star quality every time. Let's get started on creating pork that'll have your guests asking for seconds.
Ingredients for five star pulled pork
Twelve ingredients, twelve hours of magic—this is your ticket to competition-worthy pulled pork.
| Ingredient | Amount | Notes |
|---|---|---|
| Pork Shoulder (Bone-In) 🍖 | 8 lb | Well-marbled, 3-4 inch thick cut |
| Yellow Onion 🧅 | 2 whole | Chopped, medium size preferred |
| Garlic Cloves 🧄 | 10 cloves | Fresh, peeled, minced |
| Brown Sugar 🍚 | ½ cup | Light or dark variety |
| Smoked Paprika 🌶️ | 2 tbsp | High-quality, not sweet |
| Ground Black Pepper 🌶️ | 1 ½ tbsp | Freshly cracked preferred |
| Kosher Salt 🧂 | 2 tbsp | Diamond Crystal preferred |
| Dried Thyme 🌿 | 1 tbsp | Or 3 tbsp fresh thyme |
| Ground Cumin 🌿 | 1 tbsp | Toasted for deeper flavor |
| Apple Juice 🍎 | 2 cups | Unsweetened, for moisture |
| Beef Broth 🍲 | 2 cups | Low-sodium preferred |
| Apple Cider Vinegar 🍶 | ¼ cup | For tangy finish |
| Honey 🍯 | ¼ cup | Wildflower preferred |
| Wood Chips (Hickory or Oak) 🌳 | 2 cups | Soaked for 1 hour |
| Butter 🧈 | ½ cup | Unsalted, for basting |
The pork shoulder is non-negotiable here. Look for a well-marbled bone-in cut—the fat renders down during cooking, keeping the meat moist. Costco or local butchers are your best bets for quality, but the regular supermarket pork shoulder works if you trim any hard fat. A 3-4 inch thick cut is ideal for even cooking. For the dry rub, Penzeys or local spice shops carry the best smoked paprika—it's what gives that authentic smoky flavor. Don't skimp on the kosher salt; Diamond Crystal dissolves better than table salt, enhancing the rub's adherence to the meat.
No smoked paprika? Substitute 1 tbsp regular paprika plus 1 tsp liquid smoke—it's not identical, but it'll get you close. Running out of apple juice? Unsweetened white grape juice works perfectly. The wood chips can be swapped for oak or cherry if hickory isn't available, but stick to hardwoods—fruitwoods burn too quickly. For the vinegar, any 5% acidity vinegar will do, but apple cider gives that subtle sweetness that balances the smokiness. The beef broth should be low-sodium; homemade or high-quality store-bought makes all the difference in flavor depth.
This isn't a recipe you'll want to make last-minute. The pork needs 12 hours of cooking time, so plan ahead. The rub can be made 2 days in advance and stored in an airtight container. For the wood chips, soak them for at least 1 hour before using to prevent flare-ups. Leftovers? Store in the fridge for up to 5 days or freeze for 3 months. The meat actually improves after resting, so let it sit for at least 1 hour before shredding—trust me on this.
Why You'll Love This Recipe
- Foolproof Slow Cooker: I swear by this—dump everything in, set it, and forget it. The bone-in shoulder stays juicy while the brown sugar and smoked paprika turn it into melt-in-your-mouth perfection without a single flip or fuss.
- Sweet-Smoky Magic: That balance of caramelized brown sugar and deep, smoky paprika? It’s the kind of flavor that makes people ask, "What’s in this?" The garlic and onion mellow into a rich base, but the paprika’s warmth lingers like a hug.
- Leftovers I Actually Love: Between us, I make this twice—once for the main meal, once for tacos the next day. The pork stays tender for days, and honestly? The second time is even better because the flavors deepen like a good wine.
- Budget Crowd-Pleaser: A bone-in pork shoulder is cheaper than chicken thighs, and this recipe feeds six for under $20. My college friends used to beg me to bring it to game nights—now my in-laws do the same. (Yes, even on a Tuesday night.)
Step-by-step instructions for smokehouse-style pulled pork
Here's the method that delivers melt-in-your-mouth pork with a perfect bark every time.
Prepare the Rub and Season the Pork Shoulder
In a medium bowl, combine the 2 tablespoons smoked paprika, 1.5 tablespoons ground black pepper, 2 tablespoons kosher salt, 1 tablespoon dried thyme, 1 tablespoon ground cumin, and 0.5 cup brown sugar. Mix thoroughly to create a fine, even coating. This blend gives you that perfect balance of sweet, smoky, and spicy flavors.
Pat the 8 lb pork shoulder completely dry with paper towels—this step is non-negotiable for crispy bark. Rub the seasoning mixture all over the meat, pressing it into every crevice and the fat cap. The fat helps protect the meat during the long cook, while the rub ensures maximum flavor penetration. Let the seasoned pork sit at room temperature for 1 hour before smoking to ensure even cooking.
Set Up Your Smoker for Low and Slow Cooking
Soak the 2 cups wood chips in water for at least 1 hour before using to prevent flare-ups. Fill your smoker with the soaked chips and preheat to 225°F using hickory or oak wood. This low temperature is crucial for tender, juicy pork—it breaks down the connective tissue slowly without drying out the meat.
Once the smoker reaches temperature and you see steady, blue smoke, place the seasoned pork shoulder fat-side up on the smoker grates. This position allows the rendered fat to baste the meat as it cooks. Close the lid and resist the urge to open it frequently—each time you peek, you lose heat and extend cook time. The pork will take 6-8 hours to reach the stall phase, where the internal temperature hits 165-170°F.
Wrap and Finish the Pork for Maximum Tenderness
When the internal temperature reaches 165°F, you'll notice the temperature stall—a normal phase where the meat's moisture evaporates, temporarily halting the rise in temperature. This is the moment to wrap the pork tightly in butcher paper (not aluminum foil). The paper allows some moisture to escape while preserving the bark, creating the perfect balance of texture.
Return the wrapped pork to the smoker and continue cooking until the internal temperature reaches 203°F. At this point, the pork should be fork-tender, with the meat pulling apart easily. This process typically takes an additional 3-4 hours. The wrap technique, known as the "Texas crutch," ensures you get that signature smokehouse tenderness without drying out the meat.
Rest and Shred the Pulled Pork
Once the pork reaches 203°F, remove it from the smoker and let it rest for at least 1 hour in a warm oven set to 170°F. This resting period allows the juices to redistribute throughout the meat, ensuring every bite is moist and flavorful. I know it's tempting to dive in immediately, but patience here makes all the difference.
After resting, use two forks or a meat claw to shred the pork, discarding any large fat chunks or connective tissue. The meat should pull apart effortlessly, with a beautiful pink smoke ring visible just beneath the surface. Reserve 1 cup of the juices from the pork for serving—these are packed with flavor and will elevate your final dish.
Make the Apple Cider Glaze and Serve
In a saucepan, combine the 2 cups apple juice, 2 cups beef broth, 0.25 cup apple cider vinegar, and 0.25 cup honey. Bring to a simmer over medium heat and reduce until the mixture thickens slightly, about 10-15 minutes. This glaze adds a tangy-sweet contrast that complements the rich, smoky pork perfectly.
Toss the shredded pork in the glaze until fully coated. Serve immediately on soft buns with a dollop of 0.5 cup butter melted over the top, if desired. The result is a five-star pulled pork sandwich with a perfect balance of textures and flavors—crispy bark, tender meat, and a glossy, tangy-sweet glaze. This method guarantees restaurant-quality results at home every time.
Pro Tips For Making Five Star Pulled Pork
- CRANK THE HEAT FIRST: Sear that pork shoulder in a screaming-hot pan—no half-measures—until it hits deep brown in spots. I learned this the hard way: rushing the sear means the crust won’t hold up later, and you’ll end up with mushy, flavorless meat. Two minutes per side, no excuses.
- SWEAT THE ONIONS LOW: Caramelize those onions until they’re sticky, golden, and smell like a bakery—this takes 15-20 minutes, no shortcuts. Dried-out onions? Your pulled pork will taste flat. Keep the heat at a simmer, stir often, and resist the urge to rush.
- DON’T SKIP THE REST: After cooking, wrap that pork in foil and let it sit for at least 30 minutes before shredding. I know, you’re hungry now—but skipping this step means dry, stringy meat. The residual heat keeps it juicy, and your sandwiches will thank you.
- USE THE FAT: Don’t drain the pork’s rendered fat—it’s liquid gold for flavor. Deglaze the pan with it after searing, then add the onions and garlic. That fat carries all the smoky, caramelized goodness into every bite. (Yes, even if it looks gross.)
Common mistakes when making great five star pulled pork
Overcooking the Pork
I've seen countless cooks push pork past 203°F chasing that "perfect" texture, but trust me—this is where things go wrong. Once you hit that temperature, the meat starts drying out rapidly. The collagen has fully broken down, and any additional time in the smoker will turn your tender masterpiece into tough, stringy disappointment. Set a firm alarm for when you reach 203°F and resist the temptation to peek or prod the meat—every interruption extends cook time. 🌡️
Skipping the Resting Phase
This is the cardinal sin of pulled pork prep. I've made this mistake more times than I'd admit—removing that pork from the smoker too soon and trying to shred it immediately. The juices need time to redistribute throughout the meat, which happens during that crucial 1-hour rest in a warm oven. Without it, you'll end up with dry, crumbly pork that falls apart before you even get it on the plate. Patience here pays off—trust the process.
Using Aluminum Foil Instead of Butcher Paper
I get it—you've got foil in your smoker, and it's convenient. But foil creates a steam chamber that turns your perfect bark into soggy, flavorless mush. Butcher paper is the gold standard because it allows just enough moisture to escape while preserving that crispy exterior. If you don't have butcher paper, heavy-duty aluminum foil with a few small holes punched in it is your next best option. The goal is to maintain that bark while keeping the meat tender.
Ignoring the Temperature Stall
The stall is where many cooks panic and crank up the heat, but that's exactly what you shouldn't do. When the pork hits 165°F, the moisture evaporation causes a temporary stall in temperature rise. This is normal and expected—it's your cue to wrap the pork, not to increase the heat. Maintain that 225°F temperature and let the wrap technique do its magic. The stall typically lasts 1-2 hours, during which the internal temp will creep back up.
Not Trimming Excess Fat
While the fat cap does help protect the meat during cooking, excess fat can create an uneven cooking surface and lead to flare-ups in the smoker. I recommend trimming any hard fat that's thicker than ¼ inch before applying the rub. This ensures even heat penetration and a more consistent bark. Leave the fat cap intact—it's what bastes the meat as it renders—but remove any large, hard chunks that could burn.
Rushing the Wood Soaking Process
Skipping or rushing the 1-hour soak for your wood chips is a common mistake that leads to flare-ups and uneven smoke. Wet chips produce steady, blue smoke without burning too quickly. If you're short on time, soak them for at least 30 minutes, but I've seen chips burn within minutes when dry. For best results, use hickory or oak—fruitwoods like cherry burn too fast for this low-and-slow cook. 🌳
Nutrition facts
Frequently asked questions
Can I make this pulled pork in an oven instead of a smoker?
For oven-baked pulled pork, preheat to 275°F and place the pork in a roasting pan with the apple juice, beef broth, and wood chips (or a wood chip pan) underneath. Cook for 6-8 hours until it reaches 203°F, then wrap and finish as directed. The flavor won't be identical to smoked pork, but you'll still get tender, juicy results with the right technique.
How do I know when the pork is perfectly tender?
The magic number is 203°F internal temperature. At this point, the meat should pull apart effortlessly with two forks, leaving behind a pink smoke ring. If it's not shredding easily, it needs more time—don't rush it! The stall phase (around 165°F) is normal and expected, so maintain patience.
What's the best way to reheat leftover pulled pork?
Reheat gently in a skillet with a splash of apple juice or beef broth over low heat until warmed through. Avoid microwaving—it makes the meat dry. For sandwiches, assemble with warm buns and reheat briefly in the oven to keep everything crispy. Leftovers keep well for 5 days in the fridge or 3 months frozen.
Can I use a different cut of pork for this recipe?
While pork shoulder is ideal, you can use a pork butt (which is actually the upper shoulder) for similar results. Avoid leaner cuts like tenderloin—they won't have enough fat to stay moist during the long cook. If using a different cut, adjust cooking times accordingly, but always aim for that 203°F internal temperature.
What are the best sides to serve with this pulled pork?
Classic pairings include crispy coleslaw, tangy pickles, and buttery cornbread. For a complete meal, add a fresh green salad with a vinegar dressing or roasted sweet potatoes. The apple cider glaze also works beautifully on grilled vegetables or as a marinade for chicken. Think Southern comfort food at its finest!