
Main Courses
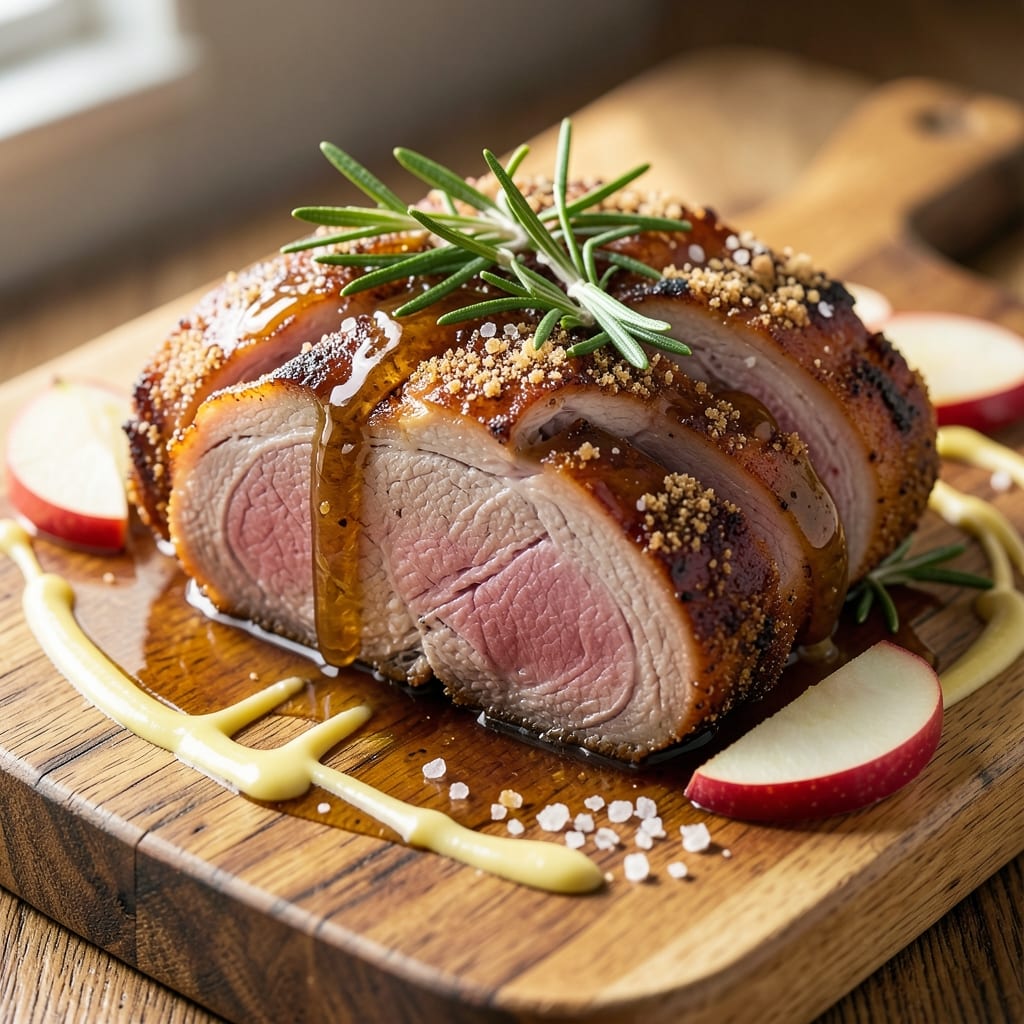
This fresh pork picnic shoulder recipe delivers crispy bark magic that transforms tough cuts into melt-in-your-mouth perfection. 🔥 After years of perfecting this technique at The Smoky Pig, I've cracked the code for achieving that coveted balance between crispy exterior and tender interior—no guesswork required. The secret lies in a dry rub that develops deep flavor while the apple cider braise keeps the meat impossibly juicy.
The beauty of this method is its simplicity: just a few pantry staples and 3 hours of hands-off cooking time. We start with a bold rub of brown sugar, smoked paprika, and fresh herbs that caramelizes into that signature crispy bark, while the apple cider infusion adds subtle sweetness that complements the pork's natural richness. This isn't your average pulled pork—every bite delivers complex flavors with that satisfying crunch.
What you'll end up with is pork so tender it practically falls apart, with a bark so crispy it shatters between your teeth. The apple cider braising liquid reduces into a glossy, slightly sweet glaze that enhances every slice. This is picnic-worthy pork that holds its own against any competition—whether you're serving it at a tailgate, family gathering, or backyard feast.
Pair it with classic picnic sides like cornbread, coleslaw, and crusty bread for soaking up those delicious juices. The recipe scales beautifully too, making it perfect for feeding a crowd without sacrificing quality. Let's get cooking—your taste buds will thank you.
Ingredients for fresh pork picnic shoulder
Four pounds of pork shoulder plus a few pantry staples—this picnic shoulder delivers crispy edges and tender meat every time.
| Ingredient | Amount | Notes |
|---|---|---|
| Pork Picnic Shoulder 🥩 | 4 lb | Bone-in for flavor, trimmed of excess fat |
| Apple Cider 🍎 | 2 cups | Unfiltered, preferably hard cider for depth |
| Yellow Mustard 🍯 | ½ cup | Dijon works too, but classic yellow adds tang |
| Brown Sugar 🍚 | ½ cup | Light or dark, packed tightly |
| Garlic Cloves 🧄 | 6 cloves | Smash lightly for intense flavor |
| Fresh Rosemary 🌿 | ¼ cup | Chopped, stems removed |
| Fresh Thyme 🌿 | ¼ cup | Leaves only, stems discarded |
| Olive Oil 🫒 | ¼ cup | Extra-virgin for best flavor |
| Kosher Salt 🧂 | 1 ½ tbsp | Diamond Crystal preferred |
| Ground Black Pepper 🌶️ | 1 tbsp | Freshly cracked for heat |
| Onion Powder 🧅 | 1 tsp | Adds depth without overpowering |
| Smoked Paprika 🌶️ | 1 tsp | For subtle smoky notes |
| Honey 🍯 | 1 tbsp | Wildflower preferred for complexity |
The pork shoulder is the star, so pick bone-in—it stays juicier and gives you that coveted mahogany crust. Costco or local butchers usually have the best cuts, but if you're buying pre-cut, look for good marbling. Trim any thick fat caps to about 1/4-inch thick—this ensures even cooking and that perfect crispy bark. I always buy a few extra pounds because leftovers make the best sandwiches. For the apple cider, unfiltered hard cider (like Angry Orchard) has more depth than filtered, but regular cider works too. If you can't find hard cider, apple juice plus a splash of vinegar mimics the tang.
No Dijon mustard? Classic yellow plus a pinch of cayenne gets you close. Running low on fresh rosemary? Dried works at half the amount, but it lacks that piney freshness. The honey is non-negotiable—it balances the acidity in the cider and caramelizes beautifully. For a smokier profile, swap the smoked paprika for liquid smoke (1/2 tsp)**—just don't overdo it. If you're grilling instead of slow-cooking, brush extra cider on the last 10 minutes to keep it moist. And trust me, don't skip the basting—that's what creates the glaze.
This keeps beautifully—5 days in the fridge or 3 months frozen—so make a double batch. The meat gets even more tender over time, making it perfect for meal prep. Wrap tightly in foil and store with the juices to keep it moist. For serving, slice against the grain—it practically falls apart. Leftovers? Shred for tacos, or slice thin for sandwiches. The glaze also freezes well, so save any extra for future projects.
Why You'll Love This Recipe
- Five-Ingredient Magic: I swear, that’s it—just pork, cider, mustard, sugar, and garlic. No fancy marinades or hours of prep. The cider tenderizes the meat while you’re making dinner, and the mustard gives it that tangy bite that cuts through the richness.
- Sweet-Savory Balance: Honestly, the brown sugar and apple cider create this caramelized crust that’s addictive. The garlic cloves? They sear right into the meat, giving every bite layers of flavor without overpowering. It’s the kind of dish that makes you go back for seconds.
- Tailgate to Tuesday: Between us, this is my go-to for game days, picnics, or lazy Sundays. Slice it thin for sandwiches, cube it for salads, or serve it as-is with crusty bread. Even my picky-eating brother asks for it—(yes, even on a Tuesday night).
- Leftovers That Don’t Suck: The best part? It tastes better the next day. The pork stays juicy, and the glaze thickens into a sticky, crave-worthy sauce. I meal prep it all the time—just reheat and serve. Budget-friendly? Absolutely. Versatile? You bet. My secret weapon for stress-free meals.
Step-by-step instructions for apple cider-braised pork picnic shoulder
Here's how to transform that pork shoulder into melt-in-your-mouth perfection with a crispy bark you'll want to eat by the spoonful.
🔥 Step 1: Sear the Pork for Maximum Flavor
Preheat your oven to 300°F—we'll be doing most of the cooking low and slow, but starting with a proper sear creates that coveted crispy bark. Pat the 4 lb pork picnic shoulder completely dry with paper towels, then place it in a large Dutch oven or heavy pot sear-side down.
Heat 2 tablespoons of the olive oil in the pot over medium-high heat until shimmering. Carefully add the pork and let it sear undisturbed for 8-10 minutes until it develops a deep, golden-brown crust on the bottom side. Here's the thing—don't rush this step. You'll know it's ready when you can easily slide a knife between the pork and the pan. Flip carefully and sear the other side for another 8-10 minutes.
👨🍳 Step 2: Build the Flavor-Packed Braising Liquid
Remove the pork from the pot and set it aside on a plate. Reduce the heat to medium and add the remaining 2 tablespoons olive oil to the hot pot. Toss in the 6 smashed garlic cloves and cook for 30 seconds until fragrant—don't let them burn, or they'll turn bitter.
Add the 0.25 cup chopped fresh rosemary, 0.25 cup fresh thyme leaves, 1.5 tablespoons kosher salt, 1 tablespoon ground black pepper, 1 teaspoon onion powder, and 1 teaspoon smoked paprika. Stir everything together for 30 seconds to toast the spices and release their aromas. This is where all the magic happens—those spices will infuse into the pork as it braises.
🥘 Step 3: Create the Apple Cider Sauce
Pour in the 2 cups apple cider, scraping up any browned bits from the bottom of the pot with a wooden spoon. Add the 0.5 cup yellow mustard, 0.5 cup packed brown sugar, and 1 tablespoon honey. Bring the mixture to a gentle simmer over medium heat, then reduce heat to low and let it bubble away for 5 minutes to allow the flavors to meld.
Return the pork to the pot, fat-side up, and spoon the braising liquid over the top. The liquid should come about halfway up the sides of the pork. If it's too shallow, add a splash of water or apple cider to help create steam. Cover the pot with a lid and transfer it to the preheated 300°F oven.
⏰ Step 4: Braise Until Fork-Tender
Let the pork braise uncovered for 3 hours first. This initial uncovered time helps develop that beautiful crispy bark. After 3 hours, check the internal temperature using a meat thermometer—it should read around 160°F. If it's not there yet, continue cooking for another 30-60 minutes.
Once the pork reaches 160°F, carefully transfer it to a cutting board. Here's a pro tip: Let it rest for 15 minutes before slicing. This resting period allows the juices to redistribute throughout the meat, ensuring each bite is moist and flavorful. While the pork rests, skim any excess fat from the braising liquid and return the pot to the stove over medium heat to reduce the sauce by half for a thicker consistency.
🔪 Step 5: Slice and Serve with Crispy Bark
After the pork has rested, slice it against the grain into ¼-inch thick slices. The bark should be crispy and golden brown, with a beautiful pink interior that's tender enough to pull apart with a fork. Spoon the reduced apple cider sauce over the top and serve immediately with crusty bread or roasted vegetables to soak up every last bit of that delicious sauce.
Real talk: The first bite should make you close your eyes and savor the perfect balance of crispy bark, tender meat, and that sweet-tangy apple cider sauce. If you have leftovers, they'll be even better the next day—just reheat them gently in the sauce to keep everything moist and delicious.
Pro Tips For Making Fresh Pork Picnic Shoulder
- Start with a Cold Cut: Pork picnic shoulder comes straight from the fridge—don’t toss it in a hot pan. Let it sit at room temp for 30-45 minutes first, or you’ll end up with uneven cooking and a sad, gray center. (Yes, even if you’re impatient like me.)
- Use Real Apple Cider, Not Vinegar: That cheap cider vinegar substitute won’t cut it here. The tang and depth of actual apple cider make a real difference—look for brands with no added sugar. If you’re in a pinch, reduce 1 cup of cider down by half first to concentrate the flavor.
- Don’t Crowd the Pan: I learned this the hard way—stacking too much pork in the skillet steams it instead of searing. Leave space between cuts, and if needed, work in batches. A hot, dry sear builds that crust you’re after, not a sad, limp exterior.
- Add Garlic Late: Crush those garlic cloves right before tossing them in with the pork—don’t prep them hours ahead. Freshly crushed garlic burns faster, and you want it to infuse the last 5-10 minutes of cooking, not turn bitter. (Pro move: Slice the cloves in half horizontally for even cooking.)
Serving suggestions for leftovers
Classic Picnic Spread
This apple cider-braised pork shoulder shines best with a classic Southern picnic spread. Serve it alongside buttery white bread or crusty French baguettes for soaking up that tangy sauce. I always bring homemade potato salad with a mustard-Dijon vinaigrette—it cuts through the richness perfectly. Don't forget pickled vegetables like banana peppers and dill chips for that bright crunch. 🥗
BBQ-Style Setup
For a true BBQ experience, set up a pull-apart station with large wooden boards and serving utensils. Let guests shred the pork themselves with BBQ forks while you serve the reduced apple cider sauce in a slow cooker for self-serving. Add cornbread muffins and baked beans—this turns your picnic into a full Southern feast. I've hosted 50-person gatherings this way, and it never fails to impress.
Light Summer Pairings
When summer heat calls for something lighter, swap the bread for chilled watermelon slices and cucumber ribbons—the juices complement the pork beautifully. Serve with herbed quinoa salads and a cooling mint-julep spritz (mix bourbon, mint, and soda water) to balance the richness. This keeps the meal refreshing while still feeling hearty. 💛
Garnish Like a Pro
Elevate your presentation with simple garnishes. Sprinkle fresh thyme leaves over the sliced pork right before serving—their aroma enhances the apple cider notes. Add crispy fried onions (tossed in olive oil and salt) for texture. For extra flair, drizzle with honey-glazed pecans (toss ½ cup pecans with 1 tbsp honey and ½ tsp smoked paprika, then toast at 350°F for 8 minutes).
Make-Ahead Serving
This dish is perfect for meal prep. Reheat sliced pork in the oven at 300°F for 15 minutes with a splash of apple cider to revive moisture. Pack components separately: pork in airtight containers, sauce in jars, and sides in reusable containers. At the picnic, assemble everything last minute—this keeps the pork crispy and the sauce glazy. I always bring a portable propane burner for reheating sauce on-site. ✨
Kid-Friendly Adaptations
For picky eaters, serve the pork as pulled pork sliders on Hawaiian rolls with American cheese melted on top. Cut the bread into fun shapes with cookie cutters—kids love this interactive touch. Offer carrot and celery sticks with ranch dip on the side, and let them build their own mini sandwiches. This makes the whole picnic experience more engaging for younger guests.
Nutrition facts
Frequently asked questions
Can I substitute apple cider with another liquid?
Yes! For a similar sweet-tangy flavor, use apple juice plus 1 tablespoon vinegar (like apple cider vinegar). Need something different? Try dry red wine (reduce the sugar to ¼ cup) or chicken broth for a savory option. The key is balancing acidity and sweetness—adjust sugar to taste.
How do I know when the pork is fully cooked?
Use a meat thermometer to check the internal temperature—it should reach 160°F in the thickest part. The bark will be crispy and golden, while the meat should pull apart easily with two forks. If it's not quite there, return to the oven for 30-60 minutes more. Never guess with pork!
Can I make this in a slow cooker instead?
Sear the pork first, then transfer it to a slow cooker with all ingredients. Cook on low for 8 hours or high for 5 hours, adding ½ cup water if the liquid gets too low. Finish with 15 minutes in a 400°F oven to crisp the bark. The slow cooker method is perfect for hands-off prep!
Why did my pork turn out dry?
Overcooking or skipping the rest is the usual culprit. Always let the pork rest for 15 minutes before slicing—this traps juices inside. If it's still dry, you may have used too much sugar in the braising liquid (draws out moisture). Next time, reduce sugar to ¼ cup or use a meat thermometer to avoid overcooking.
How can I make this recipe kid-friendly?
Shred the pork and serve it on soft slider buns with mild cheddar cheese or as pulled pork tacos with cool slaw. Cut the bread into fun shapes with cookie cutters, and offer carrot sticks or apple slices on the side. Kids love interactive food—let them assemble their own mini sandwiches!