
Main Courses
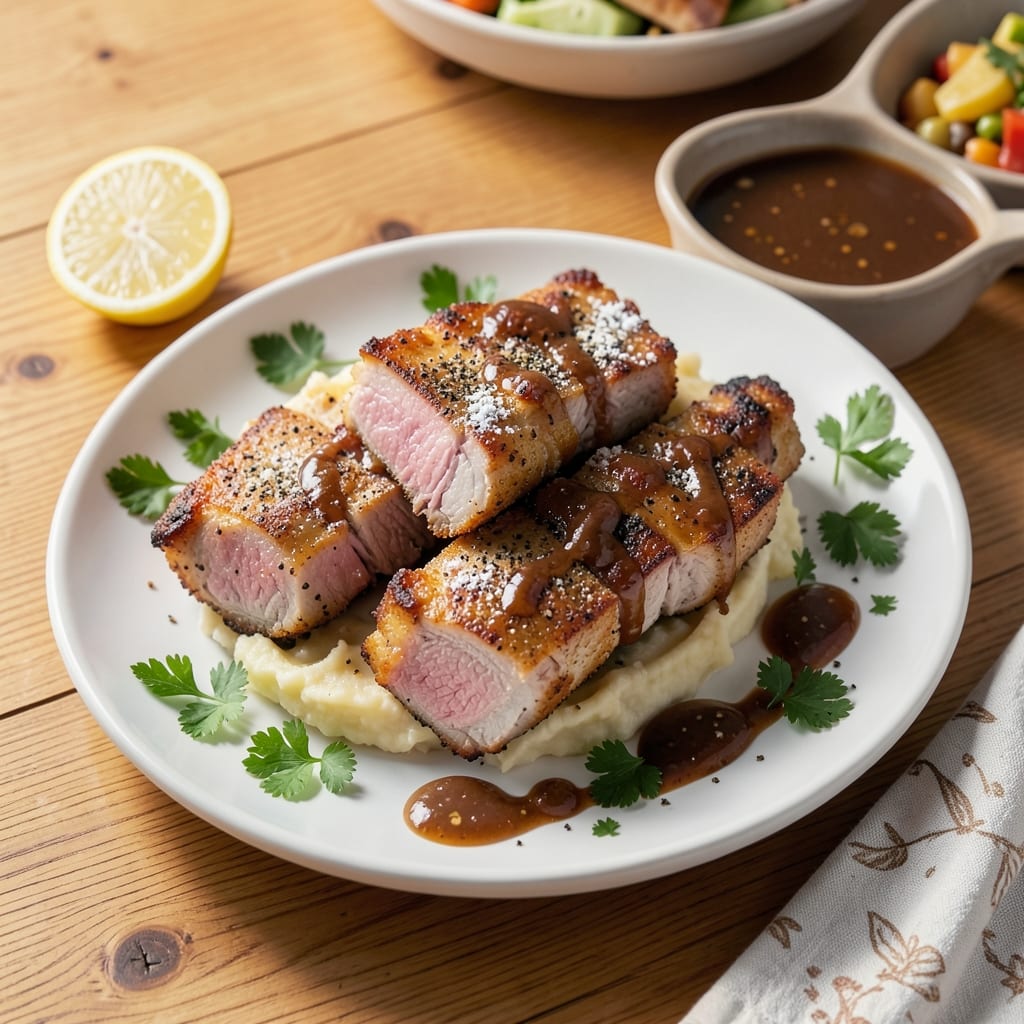
This fried pork chops and brown gravy recipe delivers the kind of comforting, restaurant-quality meal that turns weeknights into special occasions. The secret lies in achieving that perfect golden-brown crust on the pork chops while capturing every flavorful bit in the pan to create a rich, velvety gravy. After years of perfecting this technique in my kitchen—and later on a professional line—I can confidently say this is the one dish that always impresses, even when you're cooking for skeptics.
The process starts with bone-in pork chops, seasoned simply with salt and pepper, then seared in a hot cast iron skillet until they develop that irresistible crispy exterior while staying tender inside. What sets this recipe apart is the gravy—made by carefully skimming off the rendered fat and deglazing the pan with beef broth, creating a sauce that's rich, flavorful, and impossible to resist. The key is patience and attention to detail, but the results are worth every minute.
By the time you're done, you'll have perfectly cooked pork chops with a shatteringly crisp crust and a pan sauce so rich it'll have everyone asking for seconds. The gravy clings to the meat, enhancing its natural flavors while adding depth that transforms this into a meal that feels like a celebration. This is the kind of dish that pairs beautifully with mashed potatoes, roasted vegetables, or even a simple green salad to balance the richness.
What makes this recipe truly special is its versatility—it works for family dinners, holiday meals, or even a cozy night in. The technique is straightforward, but the results are anything but ordinary. Whether you're a seasoned home cook or just starting out, this fried pork chops and brown gravy recipe will become a staple in your rotation. Let's get started on creating a dish that's equal parts comforting and impressive.
Ingredients for fried pork chops and brown gravy
Here's what you need for restaurant-quality fried pork chops and velvety brown gravy at home.
| Ingredient | Amount | Notes |
|---|---|---|
| Bone-In Pork Chops 🍖 | 4 whole | 1-inch thick, rib or loin cut |
| All-Purpose Flour 🌾 | ½ cup | For dredging, any brand |
| Kosher Salt 🧂 | 1 ½ tsp | Diamond Crystal preferred |
| Freshly Ground Black Pepper 🌶️ | ½ tsp | No pre-ground dust |
| Unsalted Butter 🧈 | ½ cup | Cold, cut into small cubes |
| Beef Broth 🥫 | 1 ½ cups | Low-sodium, homemade or store-bought |
| All-Purpose Flour 🌾 | 2 tbsp | For gravy thickening |
| Whole Milk 🥛 | ¼ cup | Full-fat for richness |
| Fresh Parsley 🌿 | ¼ cup | Chopped, for garnish |
| Cast Iron Skillet 🔥 | 1 whole | 10-12 inch, well-seasoned |
| Vegetable Oil 🫒 | ¼ cup | For preheating skillet |
The pork chops make or break this dish. Bone-in cuts stay juicier and develop better flavor, so don't skimp on quality—look for chops that are about 1-inch thick with good marbling. I always grab mine from Whole Foods or the butcher counter at Kroger because they're fresher than the packaged ones. If you're using frozen, thaw them overnight in the fridge. The flour for dredging? Any brand works, but Gold Medal is what I keep on hand—it's reliable and affordable. And trust me on the cold butter—it's what gives those chops that perfect crisp without burning.
No beef broth? Chicken broth with a splash of soy sauce works in a pinch, but it won't be as rich. The milk in the gravy is non-negotiable for that silky texture—whole milk only, none of that skim stuff. If you're feeling fancy, add a pinch of nutmeg to the gravy for depth. The parsley is just for garnish, but it makes the dish look like you put in extra effort. For the skillet, cast iron is ideal, but a heavy stainless steel pan works too—just make sure it's hot before adding the butter. And if you're worried about the pork being too fatty, pat it dry with paper towels before seasoning—that's the secret to crispy crusts.
Leftovers keep for 3-4 days in the fridge, but honestly, they rarely last that long. The gravy reheats beautifully—just warm it gently on the stove and stir in a splash of milk if it thickens too much. I like to portion the chops and gravy separately so they don't get soggy. For storage, wrap the chops tightly in foil and keep the gravy in a sealed jar. If you're prepping ahead, you can even freeze the chops for up to 3 months—just thaw them in the fridge overnight before cooking. The gravy freezes too, but it might thicken, so thin it with a little extra milk when reheating.
Why You'll Love This Recipe
- One-Pan Magic: I swear by this recipe because it’s three things at once: the skillet handles the frying, the same pan makes the gravy, and the bone-in chops stay juicy while the crust gets golden. No extra dishes, no stress—just flip and let the butter work its magic.
- Butter-Kissed Crunch: That first bite? Crispy flour crust giving way to tender pork, all smothered in rich, velvety brown gravy made from the pan drippings. Honestly, the salt and pepper do all the heavy lifting here, but the butter? It’s the star—turns simple into ridiculously good.
- Weeknight to Dinner Party: I make these for lazy Tuesday dinners, but they’d fool anyone at a holiday table. Serve with mashed potatoes or crusty bread, and suddenly you’ve got a meal that feels fancy without the fuss. (Yes, even on a Tuesday night.)
- Budget-Friendly Leftovers: Bone-in chops stretch my grocery budget, and the gravy? It’s the kind of leftovers that taste even better the next day—thicker, deeper, and still packed with flavor. Freeze extras for sick-day dinners or last-minute lunches. Zero waste, all win.
Step-by-step instructions for pan-fried pork chops with homemade gravy
Here's how to get that perfect golden crust and velvety gravy every time.
Season and Dredge the Pork Chops
Pat the 4 whole Bone-In Pork Chops completely dry with paper towels—this is non-negotiable for crispy skin. Place them on a plate and season both sides generously with 1.5 teaspoons Kosher Salt and 0.5 teaspoon Freshly Ground Black Pepper. I like to press the salt into the meat so it penetrates slightly.
In a shallow dish, mix the 0.5 cup All-Purpose Flour with an extra pinch of salt and pepper. Working with one chop at a time, press it into the flour mixture, coating all sides evenly. Let the chops sit for 5 minutes while you heat the skillet—this gives the flour time to adhere properly. Don't skip this step; it's what creates that perfect golden crust.
Cook the Pork Chops to Golden Perfection
Place the 1 whole Cast Iron Skillet over medium-high heat and add the 0.25 cup Vegetable Oil. When the oil shimmers (about 2-3 minutes), carefully add the chops. They should sizzle immediately—if not, your oil isn't hot enough. Cook undisturbed for 3-4 minutes until the underside is golden brown with crispy edges.
Flip the chops carefully with a pair of tongs and cook the other side for another 3-4 minutes. The internal temperature should reach 145°F when measured with an instant-read thermometer. Remove the chops to a warm plate and tent loosely with foil to keep them warm while you make the gravy. Don't let them sit too long—they'll continue cooking from residual heat.
Make the Rich Brown Gravy
Reduce the heat to medium and add the 0.5 cup Unsalted Butter to the skillet, letting it melt and bubble for 1 minute. Sprinkle in the 2 tablespoons All-Purpose Flour and whisk constantly for 1-2 minutes until the mixture turns a nutty brown color—this is called a roux, and it's what thickens your gravy.
Slowly pour in the 1.5 cups Beef Broth while whisking continuously to prevent lumps. Bring the mixture to a gentle simmer and let it cook for 3-4 minutes until it thickens slightly. Stir in the 0.25 cup Whole Milk and simmer for another 1 minute. The gravy should coat the back of a spoon but still be pourable. If it's too thick, whisk in a splash of hot water.
Finish and Serve
Return the pork chops to the skillet and spoon the gravy generously over the top. Let everything heat through together for 1-2 minutes—this ensures the chops stay warm and the gravy clings beautifully. The chops should be juicy inside with that perfect crispy crust, and the gravy should be rich, velvety, and full of flavor.
Garnish with chopped 0.25 cup Fresh Parsley and serve immediately. The contrast between the crispy exterior and tender interior, paired with that luscious gravy, is what makes this dish truly special. Don't forget to save some of that golden gravy to drizzle over your mashed potatoes or roasted vegetables!
Pro Tips For Making Fried Pork Chops And Brown Gravy
- CRISP THE CHOPS IN BATCHES: I learned this the hard way—crowding the pan drops the temperature fast, and suddenly you’re steaming instead of frying. Use two pans if needed, and keep the heat high. A good rule: leave at least an inch between chops so they sizzle, not sweat.
- SALT THE FLOUR LIKE THE OCEAN: Don’t just sprinkle salt over the flour—mix it in. A full teaspoon per cup of flour (or more if you like it salty) ensures every bite of that crust carries flavor. Unsalted butter in the gravy means the pork needs the salt upfront.
- DON’T RUSH THE GRAVY BROWN: After removing the chops, let the pan sit for 30 seconds—you’ll hear the fond crackle and darken. Scrape it aggressively with a wooden spoon, then add the butter. This isn’t the time to rush; a rich, caramelized base makes all the difference.
- USE COLD BUTTER FOR GRAVY: I was skeptical until I tried it—adding cold butter at the end of deglazing creates a silky, emulsified gravy instead of a greasy mess. Let it melt slowly while stirring, and you’ll get that velvety texture without lumps.
Common mistakes when making great fried pork chops and brown gravy
Overcrowding the Pan
This is the #1 mistake I see in home kitchens—packing too many chops into the skillet at once. When you crowd the pan, the temperature drops dramatically, causing the chops to steam instead of sear. This leads to soggy, unevenly cooked meat with no crispy crust. I always cook my 4 pork chops in two batches, even if it means an extra trip to the stove. Trust me, the difference in texture is night and day. 🔥
Skipping the Rest
After removing the chops from the pan, many people dive right into making the gravy. Big mistake! Let those chops rest for 5 minutes under foil before you touch them. This allows the juices to redistribute, keeping the meat tender and juicy. If you cut into them too soon, all that delicious moisture will escape, leaving you with dry, tough pork. I learned this lesson the hard way during my first professional line cook gig.
Not Browning the Roux
The gravy's flavor comes from that nutty brown roux, yet so many people rush this step. If you don't cook the flour and butter mixture until it's a deep golden color, your gravy will taste raw and floury. I always whisk constantly over medium heat for at least 2 minutes**, watching closely for that perfect hue. This is where the magic happens—don't skip it!
Using Cold Butter
I can't stress this enough: cold butter is non-negotiable for crispy chops. When you add room-temperature butter to a hot pan, it melts too quickly and creates steam, preventing proper browning. Always keep your butter in the freezer for 10 minutes before using, or cut it into small cubes right before cooking. This ensures a hot pan and maximum crispiness on your chops.
Ignoring the Fat
That golden, rendered fat in your pan is flavor liquid gold—don't pour it down the drain! Many home cooks wipe out the pan after removing the chops, but this fat is essential for building rich gravy. Instead, use a paper towel to wipe out only the excess, leaving about 1 tablespoon of fat in the pan. This adds depth to your gravy that store-bought sauces can't match. 💫
Overcooking the Chops
Pork chops are done at 145°F internal temperature, but so many people keep them in the pan until they're dry and tough. Use an instant-read thermometer to check doneness—this is the only reliable way to get perfect results every time. Remove them when they reach 145°F and let them rest. Overcooking turns juicy meat into rubbery disappointment, and I've seen this happen more times than I can count in my kitchen.
Nutrition facts
Frequently asked questions
Can I use boneless pork chops for this recipe?
While bone-in chops are traditional, you can absolutely use boneless cuts—but there are tradeoffs. Boneless chops cook faster (2-3 minutes per side) and won't have the same juiciness since they lack the bone's moisture retention. For best results, pat them extra dry and consider adding 1 extra tablespoon of butter to the skillet to compensate for the lost fat. The gravy technique remains identical.
What's the secret to ultra-crispy pork chops?
Three things: dry meat, hot pan, and patience. Pat the chops bone-dry with paper towels (no moisture = no steam = crispy crust), heat your skillet until it's smoking hot (oil should shimmer at 375°F), and cook undisturbed for the full 3-4 minutes per side. The key is letting the crust form naturally—don't flip too soon!
How do I fix gravy that's too thin?
Whisk in 1 teaspoon cornstarch mixed with 1 tablespoon cold water and simmer for 1-2 minutes until thickened. If that doesn't work, make a quick roux: melt 1 tablespoon butter in a separate pan, whisk in 1 tablespoon flour, then stir this into your gravy. For a smoother texture, strain it through a fine-mesh sieve before serving.
Can I make this ahead of time?
Cook the chops and gravy separately, then reheat gently. Store chops wrapped in foil (up to 3 days) and gravy in a jar (up to 5 days). To reheat, warm gravy on the stove, then add chops to the skillet for 2-3 minutes** to crisp the crust again. Pro tip: Freeze gravy in ice cube trays for portion control—just thaw and reheat as needed.
What's the best side dish pairing?
Classic choices are creamy mashed potatoes (let the gravy soak in!) or buttery egg noodles. For contrast, try roasted Brussels sprouts with bacon or a crisp green salad with apple cider vinaigrette. My personal favorite? Cornbread—the crumbly texture soaks up gravy beautifully. Don't forget warm dinner rolls for mopping up every last drop!